Saturday, November 19, 2016

A big milestone, the decks get the gloss paint.

I finished the taping and masking yesterday at 3:30 PM yesterday. Even though I was pressing to get the boat ready to paint today, part of the day was taken up with conferring with the rigger. He and his partner showed up at the yard around noon and we went over the mast. He’ll get back to me with options and pricing for the work. Which is just the way I like it. We traded boat disaster stories which is always fun.

Last of the taping.

Masking done

After getting home I had some dinner and the spent the rest of the evening getting all my gear together for painting. This morning I went over to my friend’s house and picked up his generator.

Arriving at the boatyard around 9:00 AM  today I started laying out the materials and equipment. As I suspected, the shed ceiling was dripping with condensation and the decks were moist, to put it mildly. I set up a couple of fans to help with airflow and wiped all the surfaces with rags to speed drying.

Sill, it wasn’t until 10:30 that I could start in on the pre-paint deck prep. I vacuumed the decks for the millionth damn time, made a few quick repairs to taping mistakes  and then started in on the two-rag solvent wipe-down. After that it was time to mix up the Awlcraft 2000 and let it induct.

By the time I jacked the spray gun in and started at the bow, it was 12:30. I knew right then that I’d be finishing near sundown.

I started out pretty nicely. Easy to lay down the first coat with no problems. Man, I thought I was gonna breeze right through this job.

Yeah. No.

Started well...

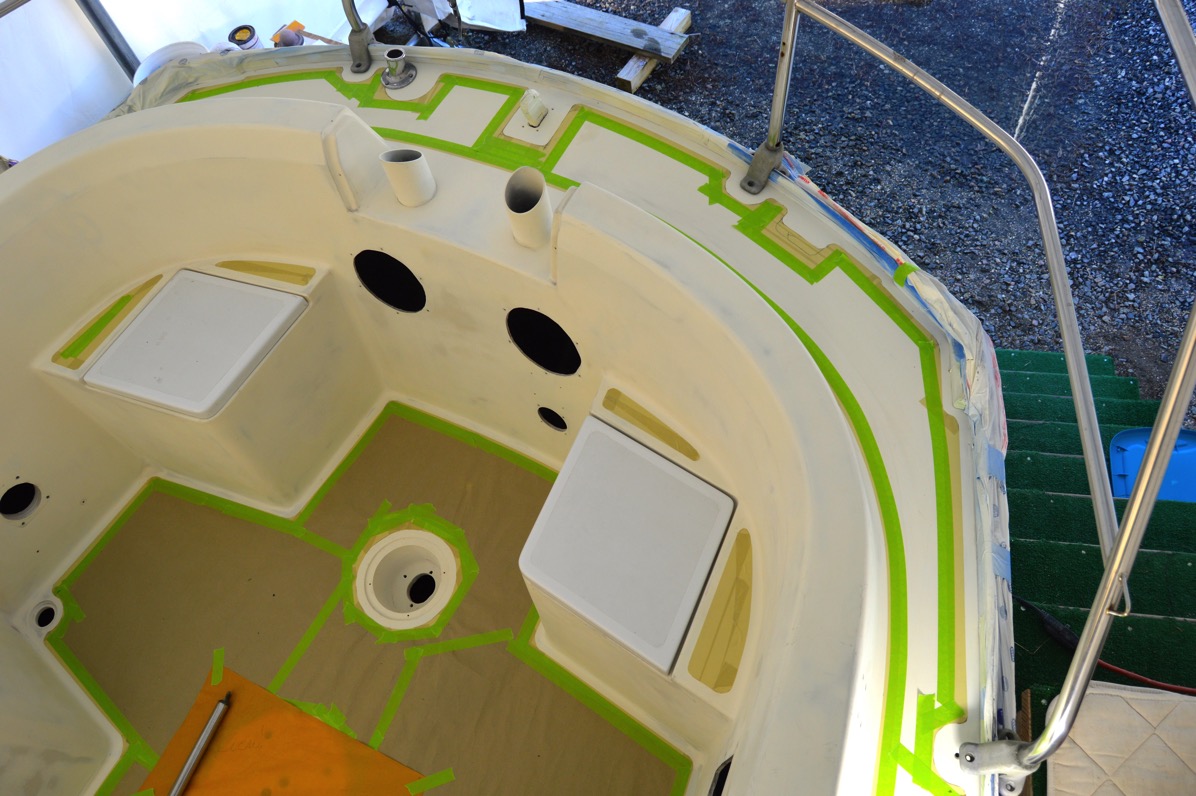
First gloss coat

What with the fact that I had to contort myself in weird positions without ever being able to stand up straight, my back started to spasm. Oh joy. Add in me wearing these damn booties that kept pulling off my feet and the quality and ease of the work began to fade. If I had a dollar for every time I looked down after stepping in fresh paint, well, you know...

Anyway, I kept at for for three passes. Finished up around 4:30, cleaned up the gun and policed the job site and that was that. Took a few photos in the dimming afternoon light and headed home as the front started to move through. I managed to get the paint on before the season shut me down.

I was pretty happy about that, getting a major task finished. Pumped really.

Next up is to take a day or two off, eat something other than chili or bean soup, meet my wife who’ll be coming back from three weeks in Barcelona. After that I’ll start in applying the non-skid paint areas.

Final product.

Better than before

Coat three on stern

View from the bow

Whats with the orange

I’m going to take some better photos tomorrow. You know, the ones showing the shiny glossy paint. With the bugs and footprints in it...


Wednesday, November 16, 2016

Pushing to beat the cold front.

Looks like this coming Saturday will be D-Day for getting the gloss topcoat painted. Weather forecast for low to mid sixties followed by a cold front. I suspect that the cold front will finally signal the end of our warm weather.

I’m pushing pretty hard most days to get the taping and masking done. I figure that I’ll be done with that by Thursday evening, early Friday morning at the latest. That will give me Friday to do a final clean of the decks, clear away the area around the boat and get all the gear running and tested prior to shooting the Awlcraft on Saturday.

With the cooler nights every morning there is a fair amount of condensation dripping off the ceiling of the boat shed. Temperatures warm up pretty quickly once the sun is out so I should be able to safely start spraying by around 11:00 AM on Saturday.

There’s no cushion in my schedule but I’m confident that the first gloss coat will be on by Saturday afternoon. After that I can “leisurely” roll on the non-skid surfaces. Of course that involves more re-taping and masking those areas. Which is not a simple job as I’m finding out.

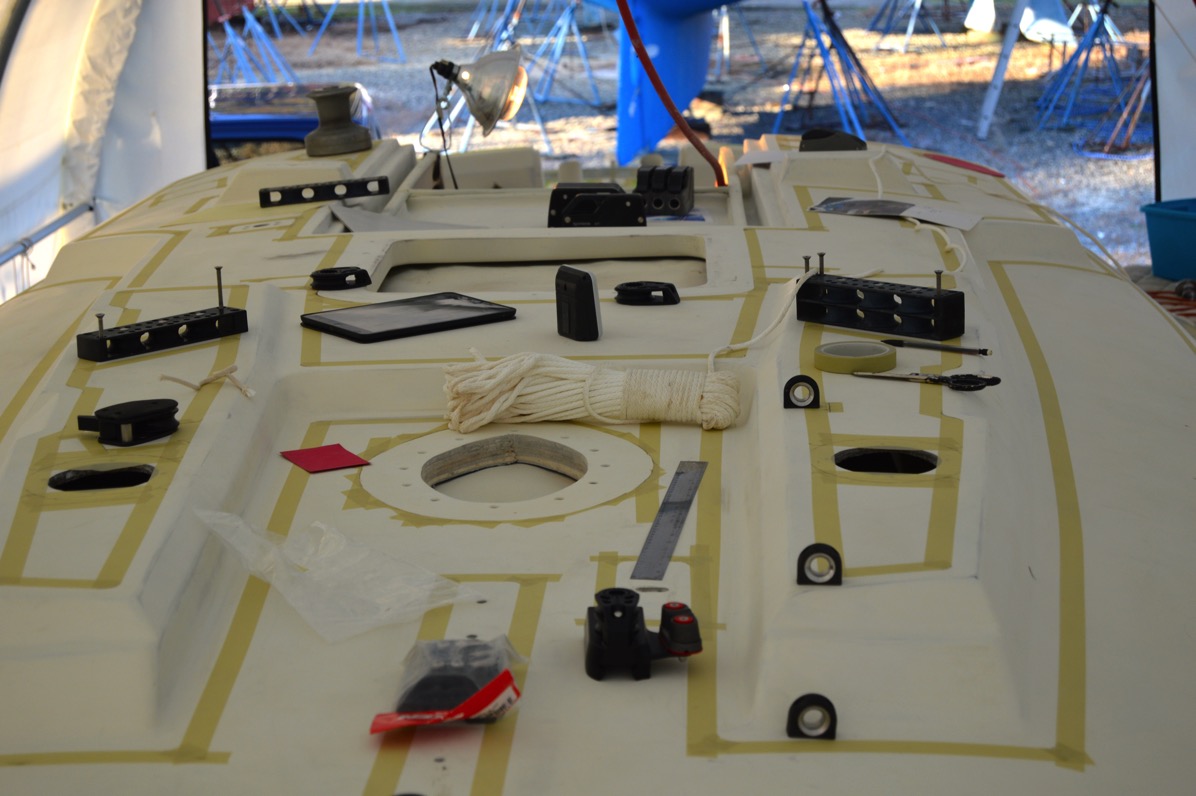
Some photos from the last three days.

Starting at the bow

Track placement

Starting to tape the upper deck structures.

First pass on upper deck

Spent all of today placing and outlining the hardware fitment.

Scattered bits

Pushing into the afternoon

For some reason I became concerned about some chips in the upper port side of the companionway entrance. I had ignored them because I mistakenly thought that the new teak surrounds that I made last winter in the shed would cover them. Nope.

I mixed up some Awlfair, slapped it on and put the heat lamp on it. It will get a basic fairing job which will not be ideal but will have to do. I can come back next Spring and fix it up as need be. 

Fitment looks okay.

Checking new surrounds

Back at it early tomorrow.

Sunday, November 6, 2016

I think I'm done with the sanding.

With the weather cooperating and after getting back from helping my brother and sister-in-law put on a 3-day, 100-mile endurance race in the Shenandoah Valley, I’ve been pushing to get the deck ready for the gloss topcoat application.

Over the years I’ve surfed the internet for examples of others painting their boats in order to get some sense of what I’m up against and how to go about it. It seems to me that all those guys get their tasks done pretty quickly and efficiently. That is not what I am experiencing.

I’ve spent two or three days just block sanding and machine sanding the primer with 320 grit for the final surface. My fingers are raw from digging into the corners and along the toerail. I finally started to “cheat” and use my Mirka sander because time is running out with the onset of the Fall season.

Protection is key.

Tired of finish sanding

With the final sanding complete I did a quick vacuum and then pulled out the masking supplies box and got to work. I started with the cockpit sole because I was tired of grinding sanding dust and yard dirt into the clean sanded primer and wanted it protected with some sturdy paper.

Protected.

This took an afternoon

What to me seemed a quick and simple job took an entire afternoon. I knew right then that I was not going be spraying the gloss coat after three days of taping as I had planned. 

Okay, I decided to take a deep breath and go into Zen mode. The prep work will get done when it gets done. The ace up my sleeve is that I called my brother and asked if I could borrow his 125,000 BTU diesel fired radiant heater.  Confirmed. Just in case the temperatures dropped out before I could pull out the spray gun...

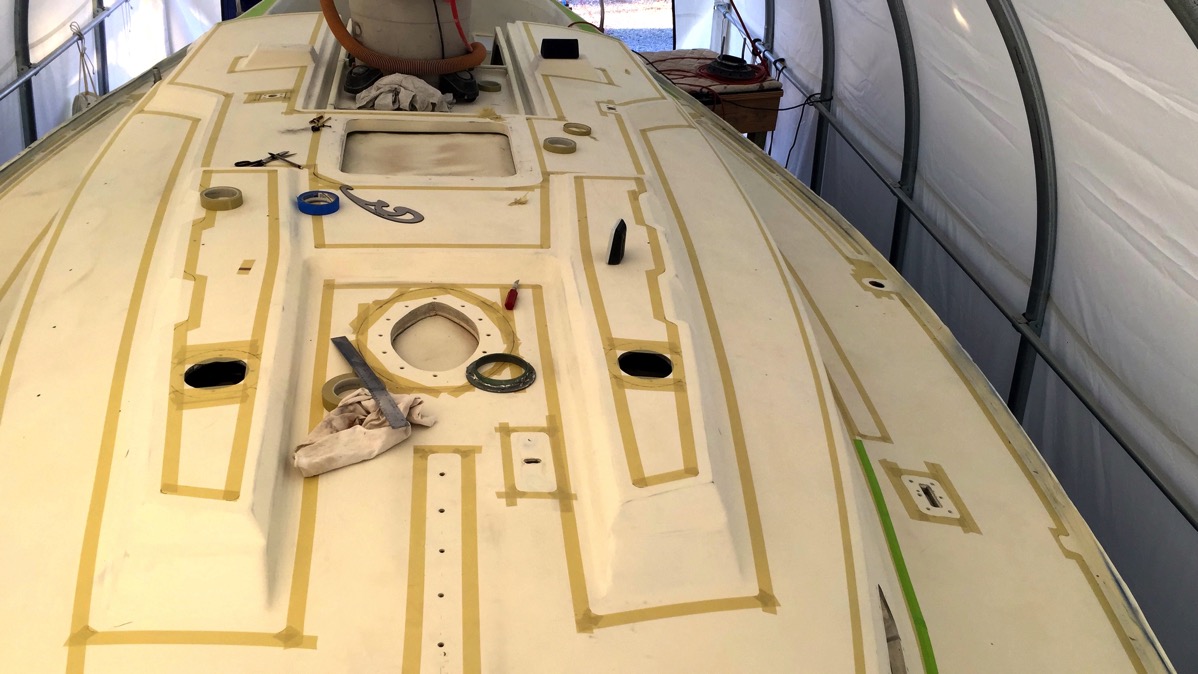
So, every day I get up, get breakfast, drive to the yard and start the very, very slow process of taping out the gloss areas with 3M 218 Fine Line tape. Lay it down, draw out the outline, cut out outlines for each stanchion base, cleat and mounted hardware. Incredibly time-consuming. It will take many days of this process. And my knees are wrecked.

I hauled the pushpit over to the yard and set it on the stern. With that in place I could outline the stanchion feet, flagpole base and an area for some miscellaneous wiring for the stern light and GPS antennas exiting the deck.

Why does the stern looks so small?

Tiny butt

Old habits are hard to break. Every damn time I would climb up the steps to start into the cockpit I would grab the top rail of the pushpit for support. And every damn time it would start to rock back off the stern. You’d think I would learn...

More taping.

Starting to mask

Tape is expensive

Expose the gloss areas

After about 3 days of work I am just finishing up running the tape up the starboard side. Lots of stops along the way to figure out the outlines for the gloss areas for the rest of the stanchion bases, diesel and water deck fills and the head pump-out deck fitting, a plate for the chainplate and the channel sides for the deck scupper drains.

Now, full disclosure; I have no one but myself to blame for this. None of those cutouts and fancy curves existed in the original deck layout. C&C simply sprayed non-skid over 90% of the flat deck areas. It was me that decided to sex it up a bit and add the gloss cutouts and line along the toe-rail. Some of the impetus for that was to make sure that any fittings were sitting on smooth surfaces so that there would be a good seal when I stared to put the deck fittings back on. And mostly because I just thought given all the time I’m putting into this effort I might as well make it look like a Hinckley.

Yeah, good luck with that...

One day’s worth:

Running the starboard side

Sophisticaled tools

As part of the project I’ve gotten in touch with a local rigger. He’ll be out in the next week or so to go over my list of tasks for re-doing the rigging. Looks like new rod and most certainly new running rigging, wiring and coax.

Sad old mast.

Tired old rig

And I wished that we would just stay on Daylight Savings Time...