Sunday, February 23, 2014

Battery Management

As part of the re-wiring job I budgeted for all new battery management controls to replace the original Off-1-2-Both Master Switch. Since I was well on my way to being Blue Sea Systems customer of the year, dryly noted by Clark Beek of “The Adventures of Vessel Condesa” blog when I sent him some photos of the electrical work I was doing on Ronin, I opted for the new, “foolproof” Dual Bank Battery Management Panel. At the same time, I used the recommended Automatic Charging Relay (ACR) so the both banks would charge while underway.

The ACR senses when the system is charging and automatically charges both banks. When sailing and the the motor is off, the system isolates the banks and ensures that the starting battery is not being used.

The attraction of this system was the fact that I could just switch the position indicator to On and not worry about whether one bank was being charged at the expense of the other or worse, that while sailing all day drawing current with the battery switch set to Both that when it came time to start the engine I didn’t wind up with all the batteries drawn down. Another position on the new panel allowed that in an emergency both banks could be combined manually.

This wiring job was also part of the starting battery locker job that I talked about in previous posts.

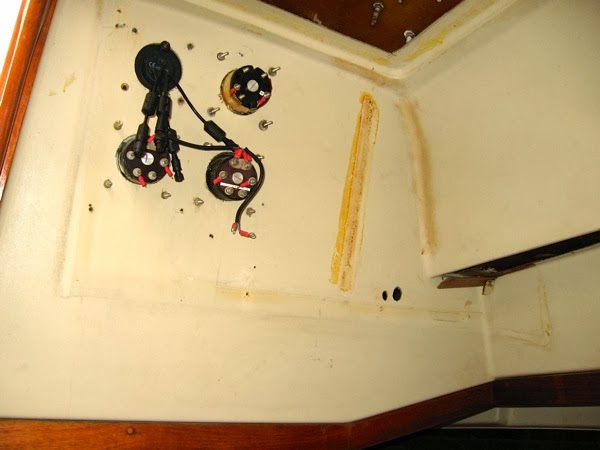
I removed the original battery switch, a cheap push-pull bilge pump switch that a PO may have installed and the light-switch style Master switch which I never felt comfortable with. Too easy to knock it into the Off position coming down the steps.
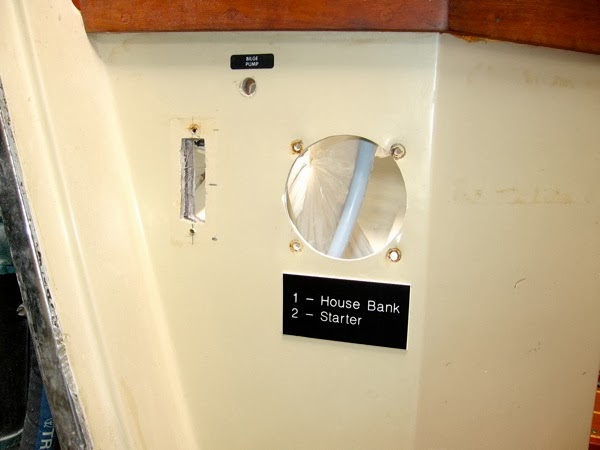
IMG 3790 JPG

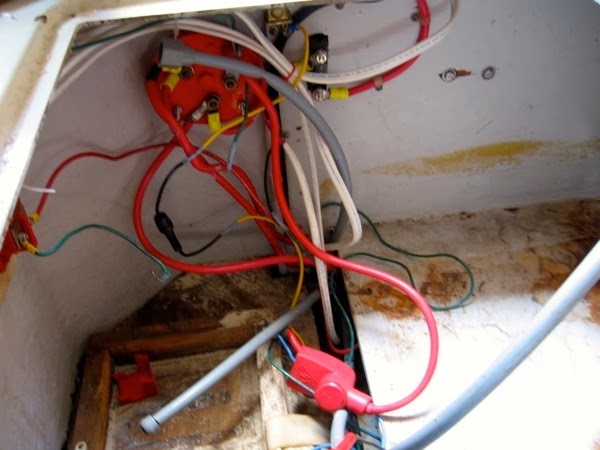
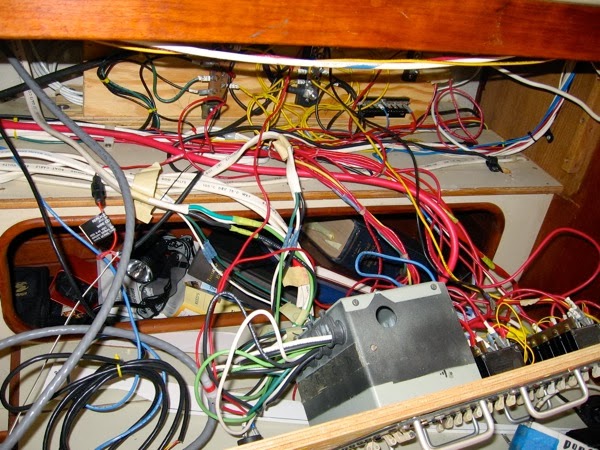
 As mentioned early, the original wiring was in pretty sad shape after fixes by both me and previous owners. 
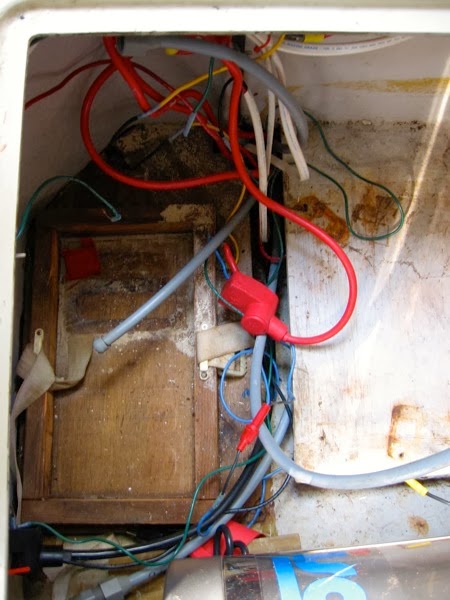
IMG 3620

IMG 3621 JPG

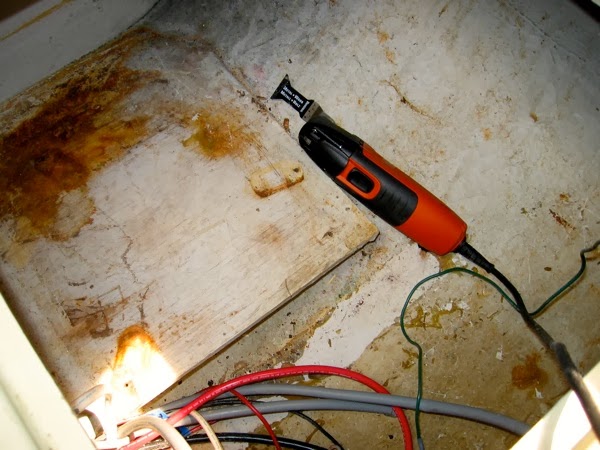
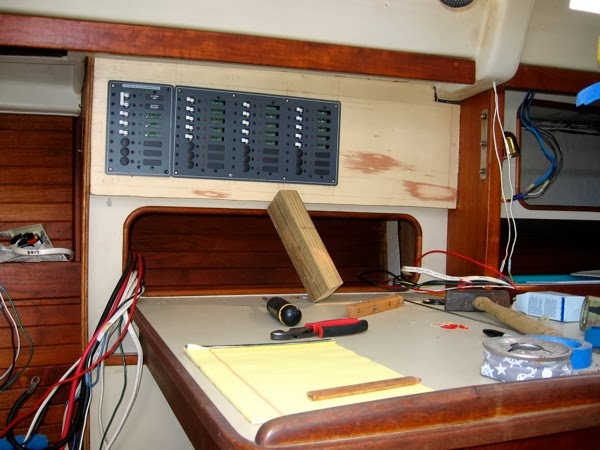
I grabbed the templates supplied by the manufacturer, taped them up and once satisfied I pulled out the Wonder Tool, the Fein Multimaster and got to work cutting the openings. 
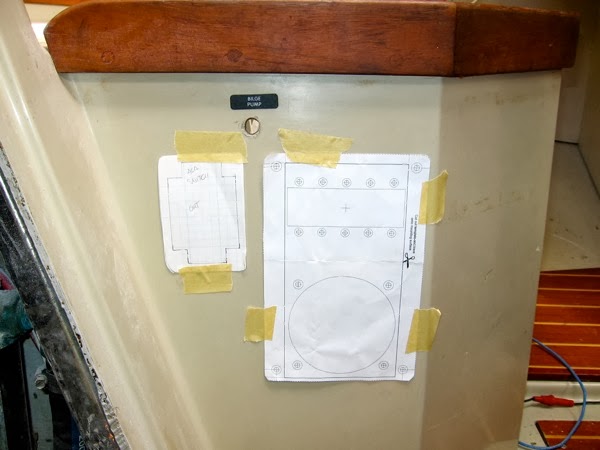
IMG 3795 JPG

The new panels positioned nicely over the old locations with the exception of the hole drilled for the bilge pump switch. I’ll search around for a nice decorative plug for that at some point.

Dry fitting the panels:
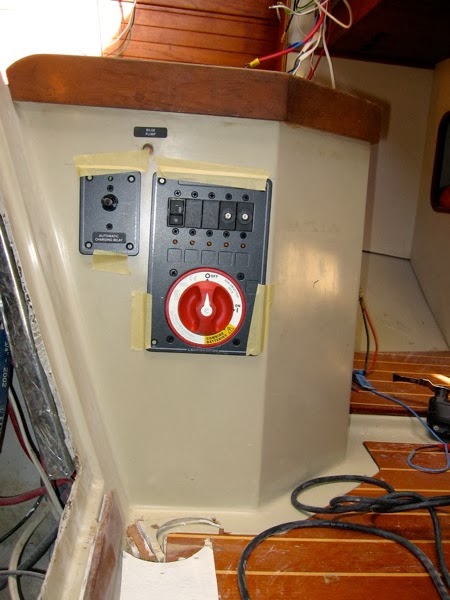
IMG 3813 JPGThe old master switch slot is now expanded and used for the ACR switch. New models have down away with the manual switch.

The new battery management panel contains the boat master switch and two continuously one breakers for bilge pumps and two empty slots for other duties as needed. Nicely thought out.

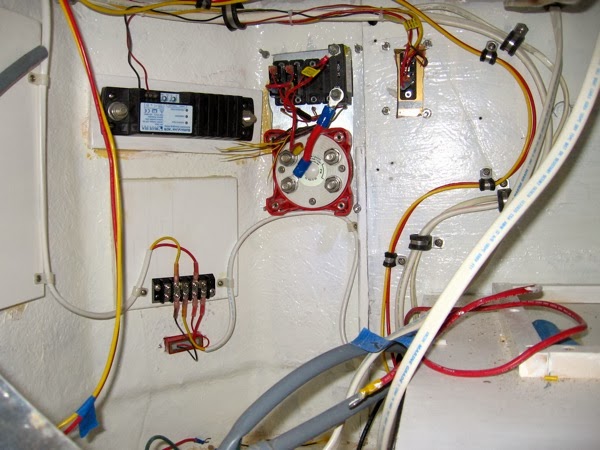
Once mounted I started in on the wiring.
IMG 4468 JPG

IMG 4497

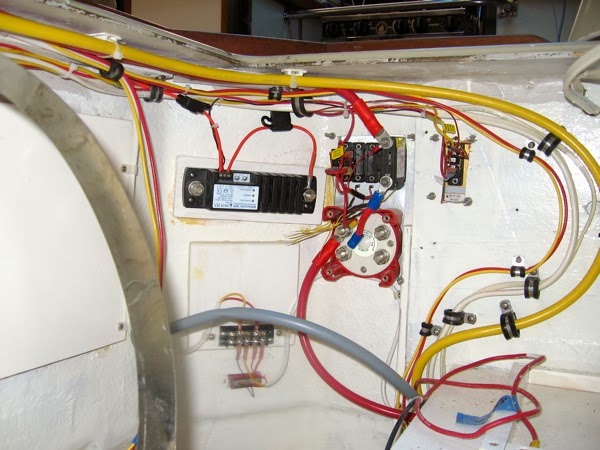
In the photos above the new battery cables haven’t even been run yet. The photo below shows the interior at a later time as more wiring and battery cable pulling was being accomplished.

I’ve hooked the system up to the batteries for a quick test and it all seems good. So far...
IMG 4535

Saturday, February 15, 2014

New Hot Water Heater

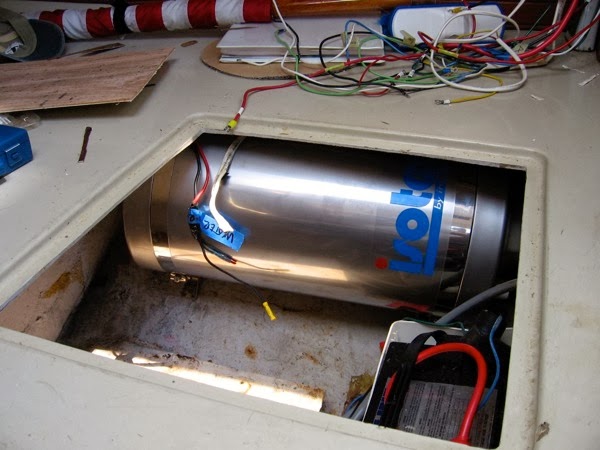
As mentioned in the previous post, the original Raritan hot water heater was on its last legs when we bought the boat. Over the years although it still heated water the tell-tale rust flakes and stains gave fair warning that some day it would need to be replaced. Surprisingly, even though it looked dead, it still worked when I finally unbolted it and pulled it out of the locker underneath the quarter berth as part of the re-fit/re-wiring job that I started several years ago.

One of the aspects of the hot-water heater that we wanted to change was to incorporate an engine driven heat-exchanger function. The original Raritan was a shore-power hot water heater only.

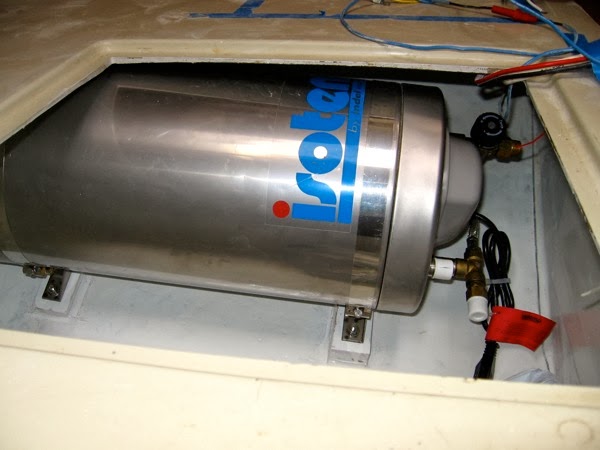
I researched manufacturers of marine water heaters and my eye was caught by the Isotherm line. I looked at the specs of their horizontally oriented units and realized that I could fit one of the 5-gallon models up in the outside part of the locker space in an area that was underutilized in the past. 

IMG 3606 JPGIMG 3623 JPG

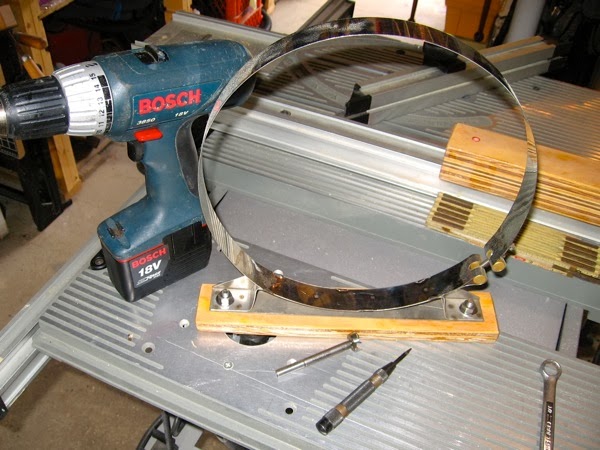
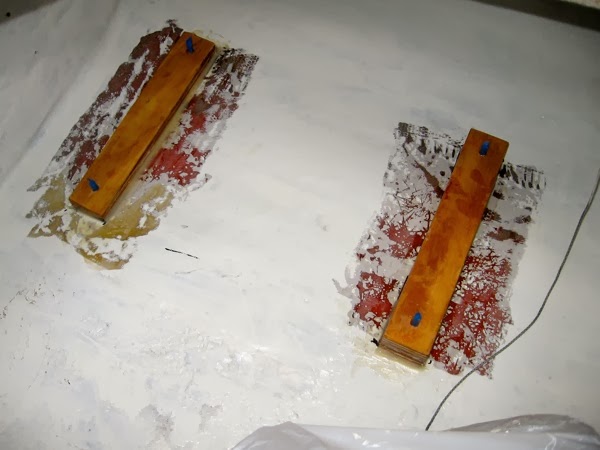
With the measurements and fitting finalized, I fabricated some mounts for the tank out of standard issue plywood, coating them will epoxy and fit some captive stainless steel bolts.

IMG 3772 JPG

As part of the general cleaning and painting of the locker space I ground off paint in the area for the mounts and epoxy them into place. A first coat of Interlux Bilgekote was already applied and ready for a second coat.

IMG 3780 JPG

The final mounting was pretty simple. Wiring and the plumbing awaits.

IMG 3831 JPG

Friday, February 14, 2014

Starting Battery Locker Redesign

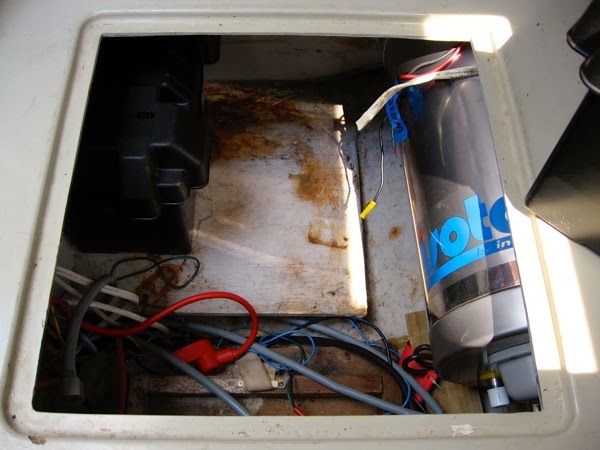
In the C&C 37’s interior there is a storage compartment on the port side underneath the head of the quarter berth. This area is also used as the seating for the navigation station. Underneath that seat and in the storage locker was the original Raritan hot water heater, long since rusted out and in a landfill, the starter battery in a black plastic battery box in front of the hot water heater and all the main battery cabling and wiring to the distribution panels. It was, not surprisingly after 30 plus years, a mess. Time for a redo!

The space missing a battery, hot water heater and fresh water pump:

IMG 3620

I had plans for the space above and beyond cleaning it. Right off, the Isotemp Basic Slim 5 gallon 115 volt and engine heat exchange tank I had purchased for replacement of the shore powered only Raritan needed to fit. I had vague thoughts of doubling up the battery capacity in that area too. The fresh water pressure pump and accumulator tank had been and still needed to be nearby. And finally, I wanted to run all the upgraded cables and wiring through that area and install the new battery management pieces.

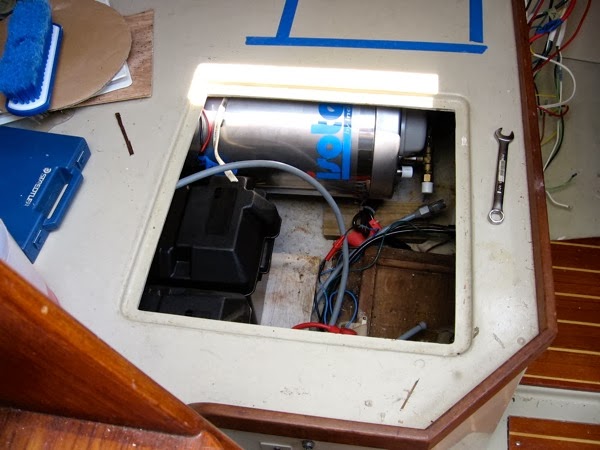
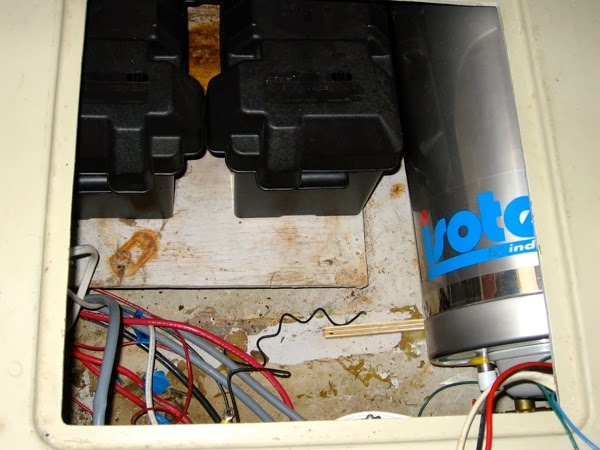
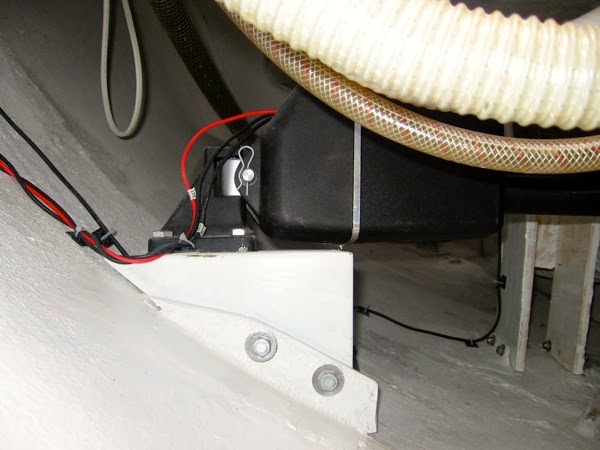
I did some simple fitting of the hot water heater so that it was as far outboard in the locker as possible. This was a good fit which then allowed me to use the spot where the former hot water shelf was for battery storage. I never like the way that the starter battery was right in the way when accessing this space. Pushing it aft freed up a fair amount of space for other things.

First dry fit:

IMG 3624 JPG

As I mentioned earlier, I had notions of doubling the battery capacity in this are, going from one to two batteries. I’m not sure that using the primary starting bank as a second house bank was a prudent move. Nonetheless, test fitting showed that two group 21 or 31 batteries with battery cases would fit quite nicely.

Second test fit:

IMG 3662

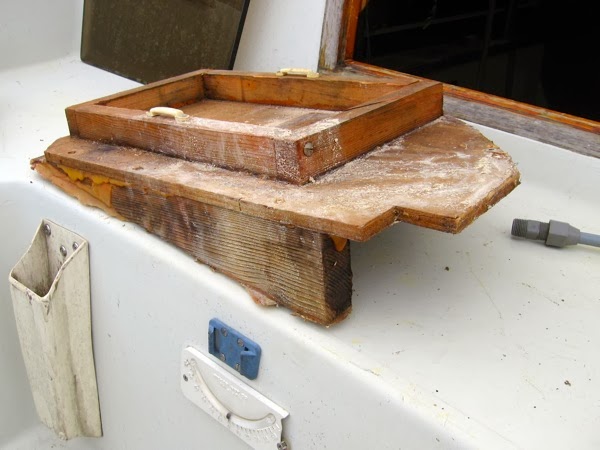
With proof of concept validated I grabbed my favorite tool, the Fein Multimaster, aka the “Wonder Tool” and made short work of the battery box shelf. It looked like C&C forgot to put one in and at the last moment as the truck was getting ready to haul the boat off to the dealer they rummaged around in the waste bin out back for some wood and glued one up quickly.

Old starting battery support:

IMG 3652 JPG

While I was in there I cut out the original hot water heater shelf. With the storage locker empty I ground out all the old fillet bonds and sanded the entire area. Repainted the entire area with white Interlux Bilgekote.

IMG 3757 JPG

I used non-marine plywood and pine boards to work up a new shelf. The new shelf was a bit larger and wider. After a couple of dry fits to ensure that grinding for the angle of the hull was accounted for I painted it with more of the Bilgekote. After it was dry I expoxied the supports into the hull and screwed the new shelf into place.

IMG 3909 JPG

The end result with the cleaned up locker space, a secured battery box and the space for the hot water heater worked out well and looked nice.

IMG 4035 JPG

I always enjoy upgrade projects and maybe making things a bit better.

Wednesday, February 12, 2014

Where to put the autopilot CPU?

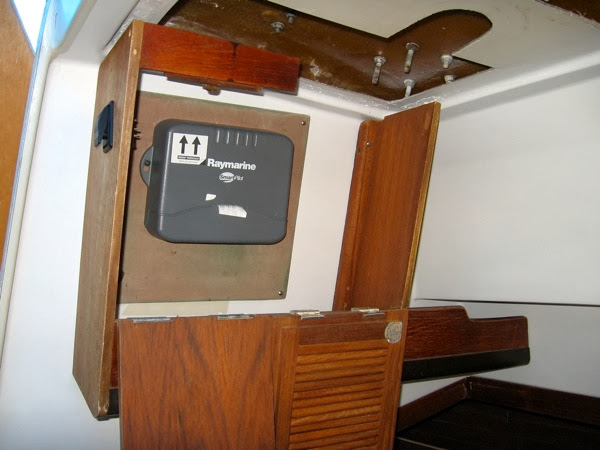
Prior to painting the interior I knew that I needed to mount the autopilot CPU somewhere safe and dry. I didn’t want it somewhere out near the drive motor in the cockpit locker area because of potential water issues and just plain lack of space and easy access. I didn’t want to put it forward and have miles of lines snaking throughout the boat.

The one thing that the boat came with was a nifty little teak storage thingy. Actually, all it did was hide the cutouts and wiring to the back of the dead B&G instruments and provide a shelf for a handheld VHF or two. Although the instruments were still in place to keep the water out, they had long ago been replaced by ST60’s at the helm and the navigation station.

IMG 4282

IMG 3522 JPG

IMG 4489

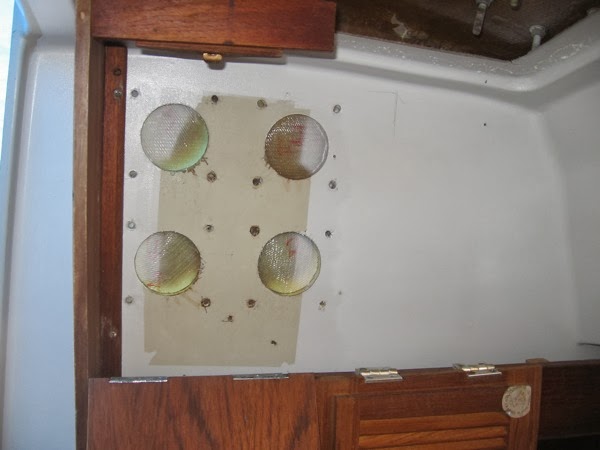
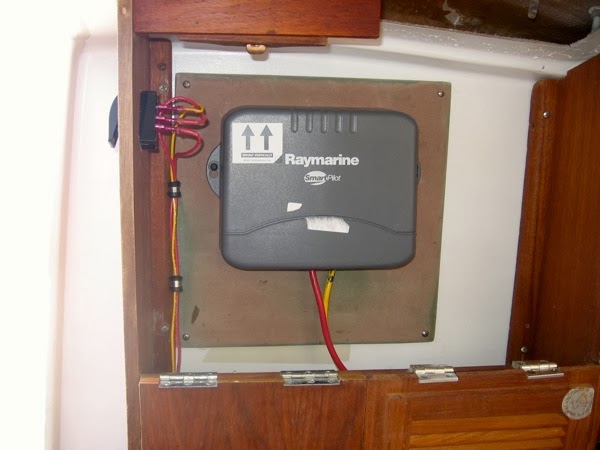
I decided to use that area behind the box for the CPU. I yanked the old instruments out and glassed in coverings in the bulkhead in preparation for eventually painting the decks.

IMG 3908 JPGIMG 3913 JPG

The next step was to take some 1/4” FRP stock that I had lying around for a backing plate for the unit. This was primarily to cover the cutouts in the cabin liner from the old instruments. After doing a dry-fit to make sure that the whole thing would work I sanded and faired the backing plate for eventual painting.

IMG 4533

The next item was to pull power and data cabling. Not pretty because of liner issues and certainly a circuitous route but it worked out okay. The factory had done it so I guess it was good enough for me. One thing I did do was clean up a lot of the nasty cut-outs that they had made on the cheap and quick.

IMG 4550

The final wiring and mounting went pretty quickly. I’m still a little leery of it’s location vis-a-vis water intrusion but it is done and given the conditions that I anticipate I think the the CPU stands a pretty good chance of survival. And it allows me to continue use that teak thingy for storage...

IMG 4554IMG 4552

More on that funky waterproof switch in the photo above in a later post.

Tuesday, February 11, 2014

Painting the Interior

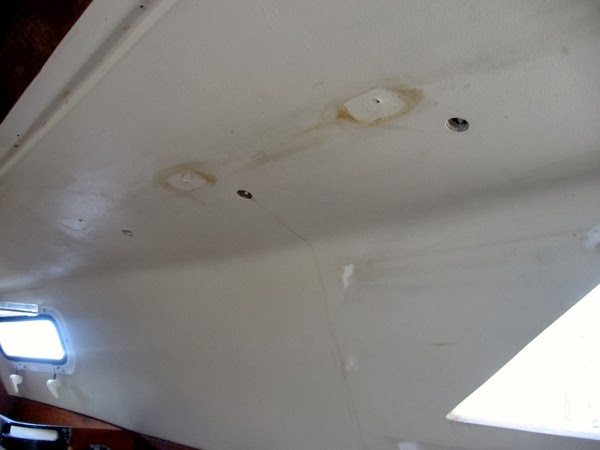
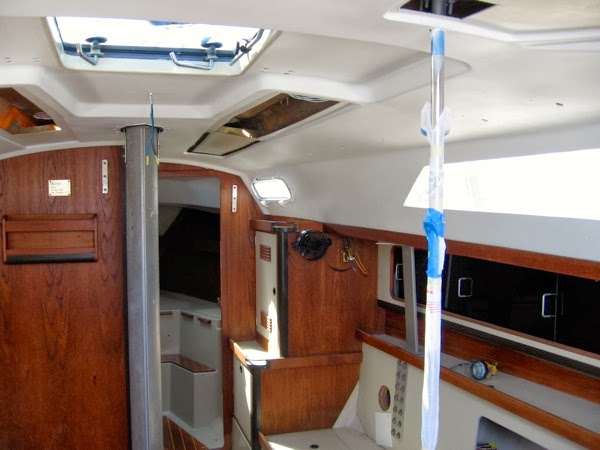
As I mentioned earlier, Ronin was in pretty rough shape and that certainly extended to the interior. Over the years, small leaks, teak oil refinishing that spread onto the liner and just general grime took it’s toll. Given that I was embarked on a major refit I decided to brighten up the insides.

IMG 4024 JPG

I ordered the supplies that I would need from Jamestown Distributors. I used Interlux Perfection Two-Part Polyurethane in Off White along with the Two-Part Flattening agent. I bought masking paper and 3M Masking Film in bulk. I already had a set of bristle brushes which I planned on using.

While I was waiting for the materials to show up I went through the entire cabin and filled in any dings, scratches or old drill holes with epoxy. Did some fairing and sanding and called the job done.

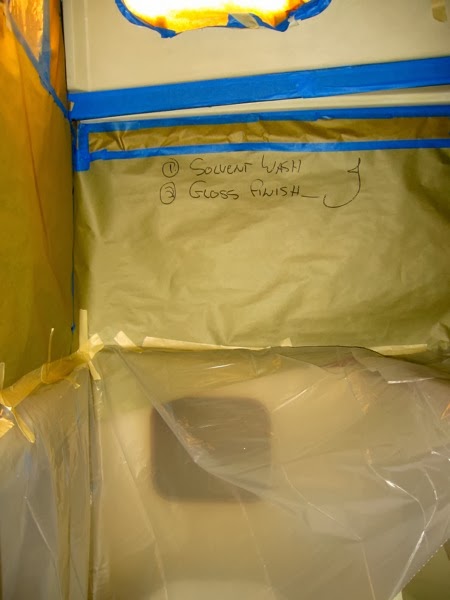
The boat was mostly stripped so cleaning and taping went fairly quickly. I made notes as I was doing this because there are areas of interior liner that I am planning on painting with Awlcraft when I paint the decks. Those areas are the smooth, non-stippled areas around the hatches and the companionway. I completely solvent washed all the surfaces that would be getting the paint and finished up covering and taping the interior. I left notes were needed because I forget many things...
IMG 4166 JPG

IMG 4042 JPG

IMG 4162 JPG

I’ve spayed many racing bottoms and was comfortable with that method but for some reason I came to the conclusion that I would brush on the interior. I started in a test area and immediately realized it was a mistake. Brush strokes. Something I just couldn’t deal with. So I quit for the day.
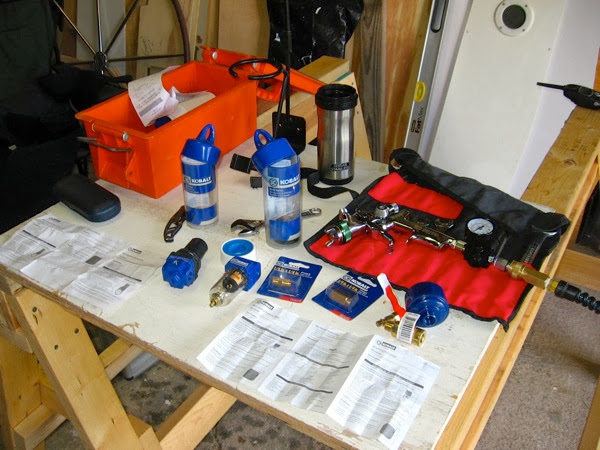
I already had a new spray gun and equipment for some smaller boat projects but my Makita shop compressor didn’t come close to CFM for a decent spray job. Off to my brother’s to borrow his larger but still not “quite” up to requirements compressor for a lot of open trigger work. I knew that I would be painting small, discreet sections of the interior so that cycling would be moderate.

IMG 4150 JPG

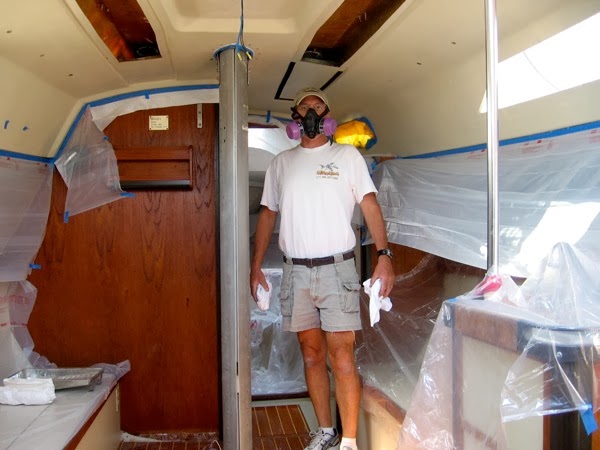
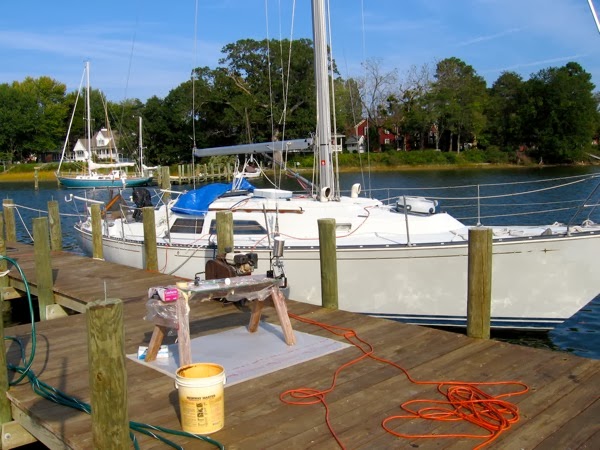
I went ahead and got things set up at the boat. Put the compressor on the dock and set up the prep table. Cheap window fans in the two overhead hatches. Already had a new respirator but put all new filters and cartridges on and checked for leaks. Good to go.

IMG 4174 JPG

The process started out fairly well but the full-sized gun I was using was pulling too much air. I switched over to the smaller detail gun that I had and that was perfect. Easy to get into smaller areas and it had enough of a fan to not slow the job down. Actually worked out well because I would work a section and then stop to let the cabin clear of spray. The whole job of actually painting the interior only took around an hour or so.

Anyway, after stripping the masking paper and pulling the tape, it was a job well worth the effort.

IMG 4199 JPG

Makes the interior much more pleasant.  I have new overhead panels in white that will be put up so the color matching will be nice.

Monday, February 10, 2014

Autopilots - From the wheel to below deck

While motoring Ronin from our house to the marina for annual maintenance in the Spring of 2007, around 3 nm into a trip of 30 nm I noticed that the original Raymarine ST4000+ wheel autopilot that had provided yeoman service for 9 nine years had quit. It wasn’t the first time and it had been repaired once before. I’ve had a lot of experience hand-steering boats off-shore and coastal cruising so it wasn’t anything more than an irritant in this instance. No wind so it was just a matter of getting comfortable and keeping one foot on the wheel. I was fine without it that day.

I really, really like autopilots. I always tell folks new to sailing that one of the first things they should get for their boat is an autopilot. Makes single-handing easy, keeps the wife happy and it doesn’t yell back or drink your beer. Although the wheel mounted autopilot was fine for the Chesapeake Bay, I knew that an under-deck unit was called for given the loading parameters for our boat and there was a fairly high probability that Ronin would be going off-shore in the future. In this case, bigger was better.

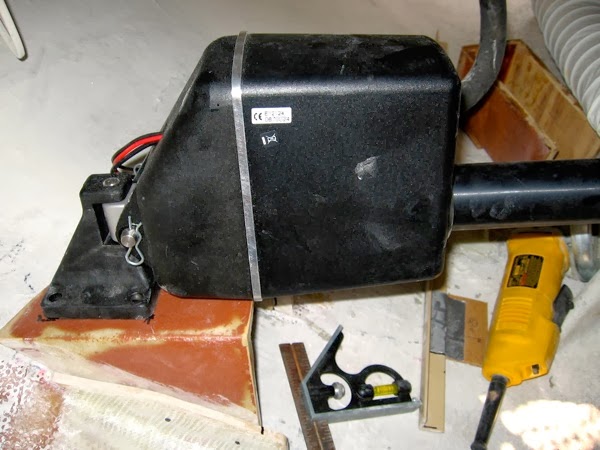
We sprung for a new Raymarine ST5000+ system with a S1G Corepack and Type 1 Linear drive. At the same time we purchased an Edson machined tiller arm.

On Ronin, the only access to the steering quadrant and anything under the cockpit is down through the starboard locker and squeezing aft. And I mean squeezing in the full sense of the word. It’s fortunate that I am still relatively thin for someone my age. And reasonably limber (thanks yoga…) because if not, I would have to hire youngsters to crawl aft to work on things.

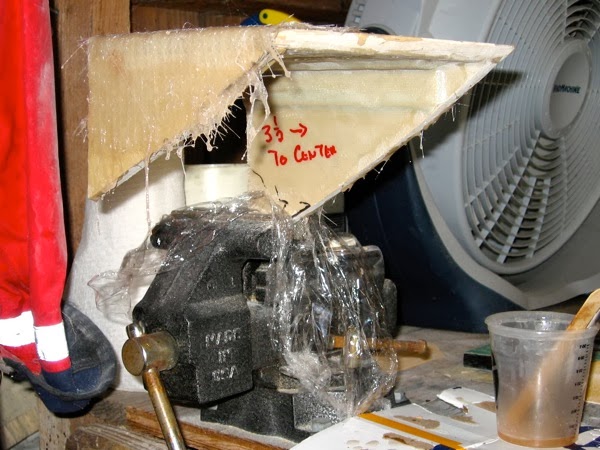
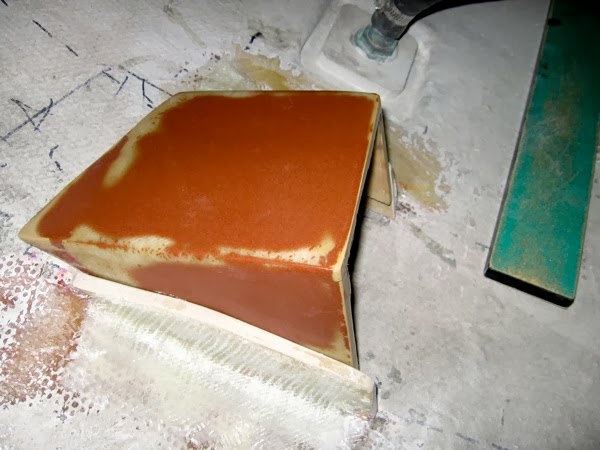
Because the mounting position that made the most sense for access and effort the new linear motor and drive arm would block what little crawl space I had to find a work-around. After thinking about it for some time I decided that rather than do a standard installation using a base mount glassed to the hull I would create the same thing except that I would make the unit’s base a bolt-on affair. This would leave the most vertical access possible.

After doing extensive measuring and re-measuring to ensure that the motor was mounted according to the specifications I purchased flat sheet and angle FRP stock from McMaster-Carr and got started fabricating the whole structure.

Measuring tool to ensure that the correct angle was not exceeded when mounting the unit.

IMG 1882 JPG

Start of the drive motor mounting platform.

IMG 1878 JPG

Starting to fit the pieces together. Despite extensive measuring I still got it off. Frustrating.

IMG 1911 JPG

More checking to make sure that the mount was in (mostly) the right place.

IMG 1914 JPG

The final installation with paint, bolts and wired up.

IMG 3576 JPG

Although it works, it bothers me that it isn’t quite right. I have plans to cut the low, hull mounted frames out and do them over again. But that has to wait until other projects are completed. I have tested removing the drive and mount and I can still fit and get aft.

Sunday, February 9, 2014

Before the halt - Electrical

Before I pretty much downed tools and walked away from the refit of Ronin, I had made good progress on the what amounted to a complete re-wiring of the boat. I decided to go ahead and spend the time and money because the twenty-five year-old wiring was becoming problematic. I was having problems with starting the engine. The original distribution panels were insufficient for our planned upgrades. The original wiring was corroding and in some cases, the connections to the breakers were either barely hanging on or were doubled up so that one breaker was responsible for several circuits. The overall mess behind the distribution panels was a problem if any emergency repairs were required.

Around 2000 I decided to pull the original distribution panels, paint them, replace any suspect breakers and generally just clean up the factory wiring as much as possible. It wasn’t pretty. I did the best I could without spending much money, basically sorting out and identifying all the circuits. That in and of itself was a fairly large job. I was able to come up with a wiring identification sheet so that I knew what was what behind the walls.

After replacing all the original connectors, I used the existing wiring and bus bars which I placed on up a simple wiring backing board to help organize things. Any orphan wires, and there were a few, were labeled and wrapped up for future investigation.

IMG 3506 JPG

After completing that task, I roughed out a panel to replace the original one and screwed it into place at the navigation station. Not pretty but it did have some unique art features. And it functioned well. We kept it for a long time.

IMG 0876

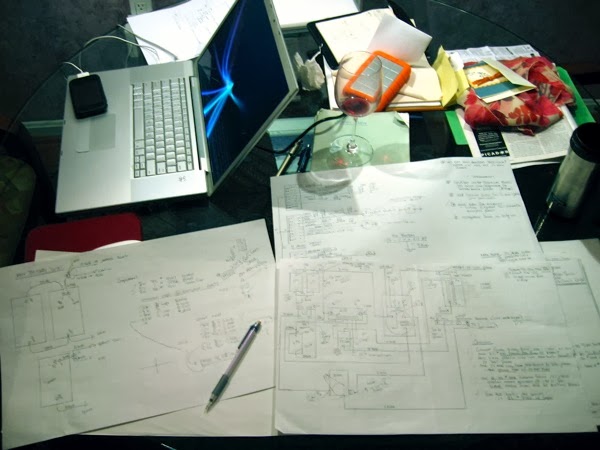
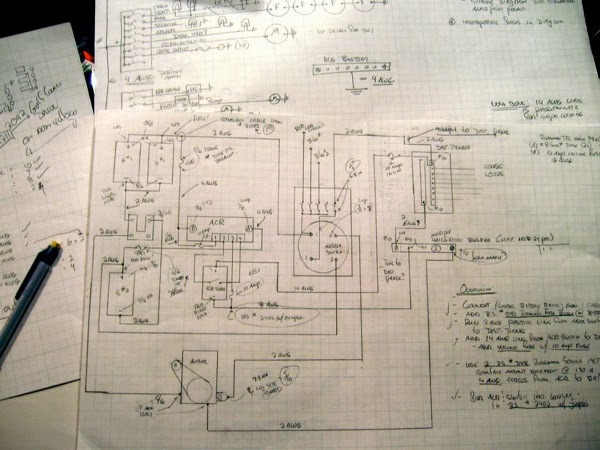
As I was doing this I was keeping in mind that I would need to do a complete refit of the electrical system. I took notes of all the wiring in the boat and put together a wiring diagram of the existing system.

In 2009, when I started in on the design and work to upgrade the electrical system I was able to put together a proposed wiring diagram for our upgrades based on the original wiring diagram. The preparation was well worth the effort.


IMG 4342 JPG

IMG 4343 JPG

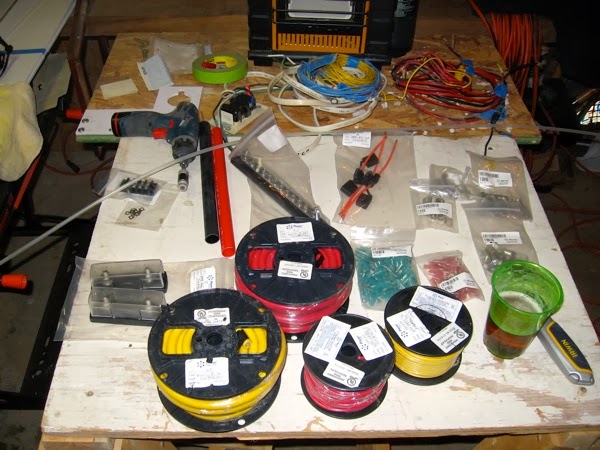
After getting an idea of where I wanted to go, I started ordering. Distribution panels from Blue Sea Systems. Battery management panels too. Bulk wiring, cabling, connectors, bus bars, terminal blocks and switches. Any and all the tools that I didn’t already have.

Over the next summer I cut, pulled out, snaked in, added new and removed old, circuits that would replace the existing ones and used for new purposes. Although I already knew, it was still a big, time-consuming and expensive project. But I think that the results will be a big plus.

New distribution panel test.

IMG 3536 JPG

New electrical wiring shelf and backing panel.

IMG 3785 JPG


Some of the supplies. With an IPA...

IMG 4312 JPG

IMG 4314 JPG

More posts of previous work coming...

Introduction

I've started this blog primarily to keep friends and family up-to-date on the condition of our sailboat, Ronin. I'm also using it to keep a running record of the work that gets accomplished. Or that doesn't.

Ronin is a Rob Ball designed 1982 C&C 37, hull number 18 that we purchased from a bank sale in the Summer of 1997. She was in pretty bad shape, bare-bones, rode hard and put away wet and on the hard with the mast lying on the deck and the engine not running. Most buyers would have walked away and maybe we should have too but we got her for small money. Of course, as most boat owners know, buying a boat is the cheap part. It's the keeping that's expensive.

Over the years we've done major upgrades and repairs. Mast spreaders and standing rod rigging rebuilt, added Harken roller furling, all new running rigging, new Harken traveler and mainsheet blocks. The original boom was replaced with a new custom built item. We put on a 1/3 battened main and 140% laminate jib among other things.

We had the Yanmar 3HM rebuilt and converted to "fresh water" cooling (3HMF). New motor mounts and soundproofed the engine space. Refurbished the Martec folding prop and replaced the cutlass bearing. Replaced the stuffing box with a dripless seal.

We replaced all the cushions with new foam and covered that with Ultrasuede. Replaced the cabin sole. A new Broadwater 4-burner propane stove and oven to replace the original alcohol unit. A new head. Several water pumps because the originals were broken due to freezing while on the hard.

The non-functional B&G's were replaced with Raymarine ST60 instruments. An ST4000+ autopilot and new Icom VHF were fit. Used a cheap Garmin to keep the info flowing to the instruments and autopilot. Installed a Link 20 dual battery management display. We did retain the original Loran receiver until the signal stopped. You just never know...

We had the main hatches rebuilt by Atkins and Hoyle, replaced the fixed main cabin ports and both the opening Beckson ports. Added a cockpit dodger.

As all this was happening over the years we still sailed her, day sails, weekends and week-long cruises.

But over time even these repairs and upgrades began to get old and needed updating. The list of things that were wearing out, non-functional or outdated kept growing, as did the number of niggling problems. And the boat was still getting older and having typical old-boat issues.

So about 5 years ago we thought about what to do. We'd reached the decision point that many boat owners do; rebuild or replace. We both love the size, sailing characteristics and looks of the C&C 37 so we decided to budget the money for a complete refit. It doesn't really make sense given the amount of money put in versus what the boat is worth but that's the choice we decided to make.

I started in on the project, knowing that we would not be able to use the boat for several years. I was overly optimistic. After striping the boat of anything not glassed in or bolted down I dug in. And then pretty much stopped. Combination of new work environment and new duties. Then we decided to completely rebuild our house on the water where we keep Ronin. That right there meant that all my tools and supplies were in storage for a year.

But the house is done, I have a new shed with all my supplies and tools at the ready and most importantly, I am retired. So that means that I can spend time on the project. I hope.

Anyway, I am back at the refit of Ronin. Still a lot of work to complete. If all goes according to plan (yeah, good luck with that...) she'll be back ready to go for the Summer of 2015 with all new electrics, refrigeration, running rigging and lifelines, a couple of sails, ground tackle, new deck hardware, under deck autopilot, new dodger, rudder repair, keel tightening, rigging upgrades, and all new paint on the hull and deck.


OnStarboard