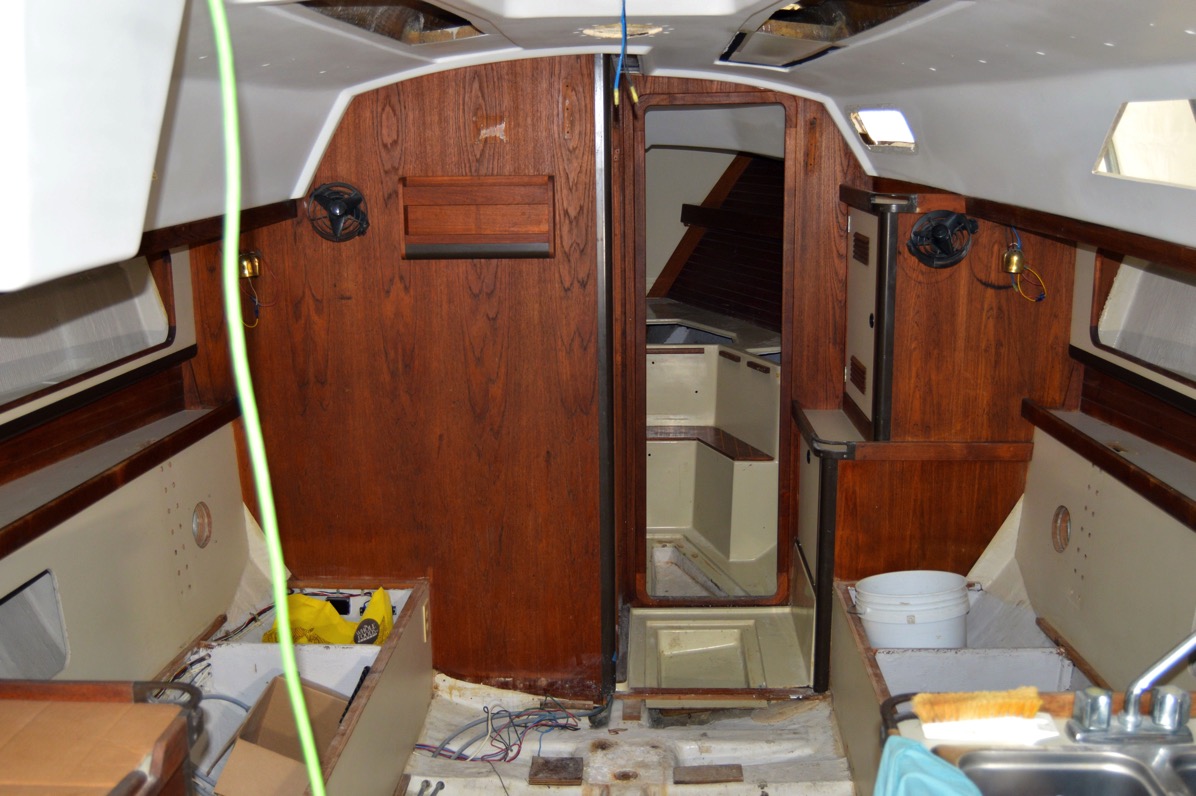
Sunday, April 10, 2016

Houdini, hoses and a box.

Using the list of materials that I put together for the new and upgraded bilge pump systems, I pulled out the credit card and got to the real work. Ordering stuff. I’m good at that. Actually putting the stuff into and on the boat, Less so.

A few days later the hose that I ordered started to arrive. Three boxes of 50’ each, 1 inch, 1-1/8 inch and 1-1/2 inch respectively. With those in hand I cut segments of each and went over to the boatyard and had Charlie order some Scandvik 316 S.S. hose clamps and Ancor cushion clamps. Included in that order was a Forespar Marelon vented loop/siphon valve for the new Rule 2000 bilge pump system. Other orders coming in had new cockpit Marelon cockpit drains, two new Marelon thru-hulls, one for the existing manual Whale pump and the other for new Rule bilge pump. The Whale Super Sub Pump 650 pitched up on my porch too.

Armed with my "box o’ bilge supplies", I started making short trips to the yard to get some measurements and ideas of how to run things. In-between those trips and because the weather in the Mid-Atlantic region has been awful for weeks, I continued to work on the storage box project in my shed.

Taking the sheets of 3/16” FRP I ordered from McMaster-Carr, I cut out the side panels and a floor panel using an old dull table-saw blade. Worked pretty well actually. With the pieces  assembled I “tacked” the structure together using some West System Six10 that I had lying around. With that set up I ran some fillets along the inside corners using Awlfair so that there wouldn't be tight corners that were hard to clean.

Wear a respirator!

Cheap blade

Not enough sides

After getting the entire box put together I started applying strips of 4” tape along the edges to give it some structural integrity. That was a mistake. Trying to get a bond between the glass and the sharp corner was unpossbile. I stopped and set that project aside for later work.

Don’t try this at home.

Fail

So, back to the bilge systems. Like many of the items on the project list, I always assume that the effort required will be, well, effortless. 

Pulling that new bilge hose put paid to that nonsense. Running the 1” line from the small Whale sump pump, no problem. Running the 1-1/8” line from the new Rule 2000 alongside the motor and aft to the transom, a bit more effort.

Then is was time to replace the 1-1/2” for the original Whale Gusher 10. Lord, that sucker kicked back. With a combination of external ribs, intrinsic stiffness and a very shallow bend angle, I spent 2 hours pushing and pulling. And to make matters worse, trying to run the same route as the original was a bust. Because the new hose was unable to navigate some tight turns it ended up kinking badly. I had to start sawing away at little bulkhead into the bilge in an effort to get a direct line through but that wasn’t going to work no matter what.

I also had to cut the hose in order to get (force) it through that opening. That hose size prefers to run in straight lines. One connector and four hose-clamps later I had the line rum from the front of the bilge back to the pump location near the wheel. And I have the scratched and bloody arms to prove it.

Starting to look okay.

Hole saw work

With the hoses pulled I started to dry-fit the connections and pumps. I placed the cushion clamps to get an idea of ideal locations but will not secure them until later when all the pumps and connections are finished.

Should work.
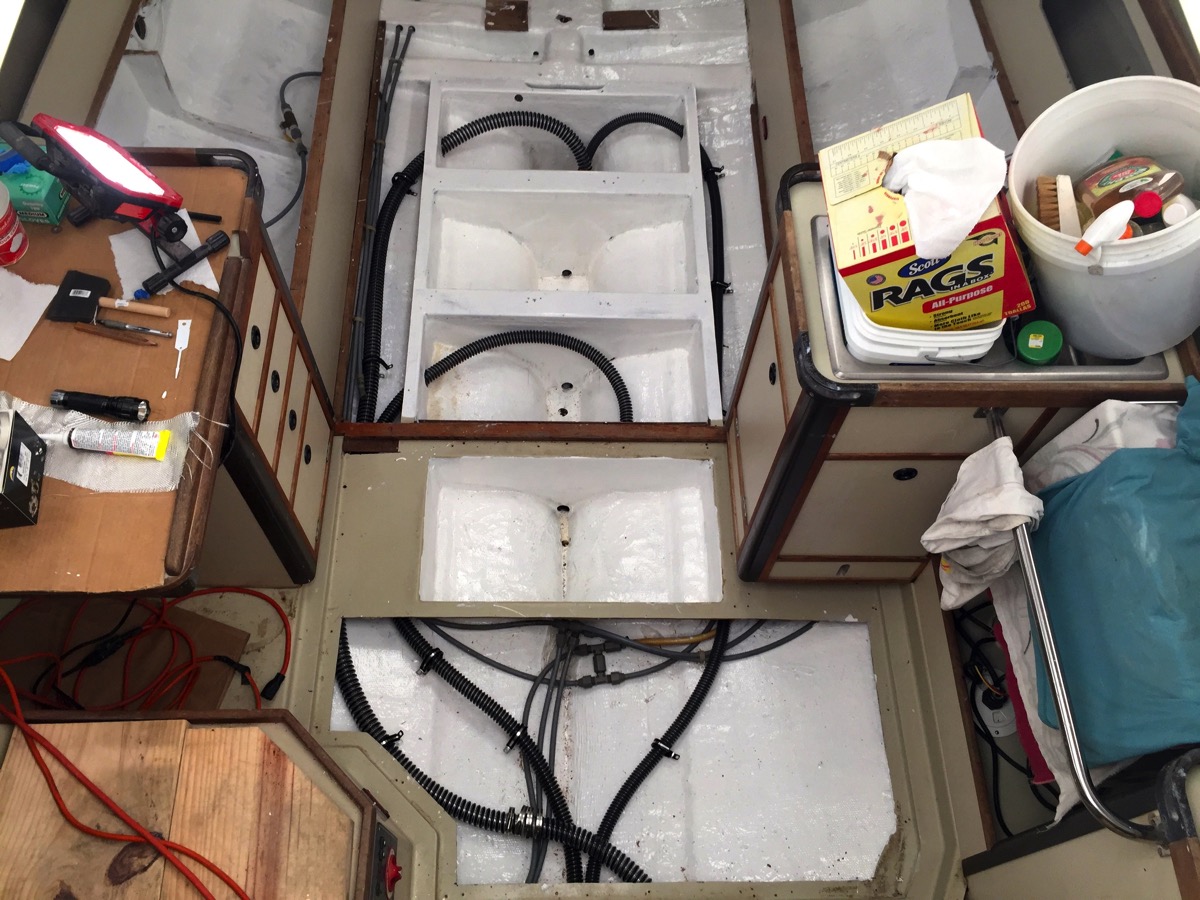
Clamp placement

More dry fitting

The next day I came back to the boat to start in on getting the new bilge pump system (Rule 2000) in order. To do this I needed to crawl underneath the cockpit and get to the stern. I’ve mentioned previously that this requires one be a top-level yoga instructor. And thin.

I grabbed as many tools and supplies that I figured I would need and started to contort and wiggle my way aft. Once there things went well. I pulled the hose and secured it in places with clamps. Those that went into core were drilled and filled with caulk. After that was done I started to figure out the placement of the vented loop. I thought that securing it to the stern would work fine. And it would except for the fact that the mounting screws would poke right through the transom and my new paint-job. Okay, time to stop.

I went home and grabbed some wood, cut and painted it so that the vented-loop screws into it. After the paint drys I will once again make the journey to the stern, epoxy it into place and when the epoxy cures, secure the hose.

Oh, and once that effort is done, I need to start obsessing about drilling a new hole in the hull for the discharge. Oh boy.

It’s stuffy in here.
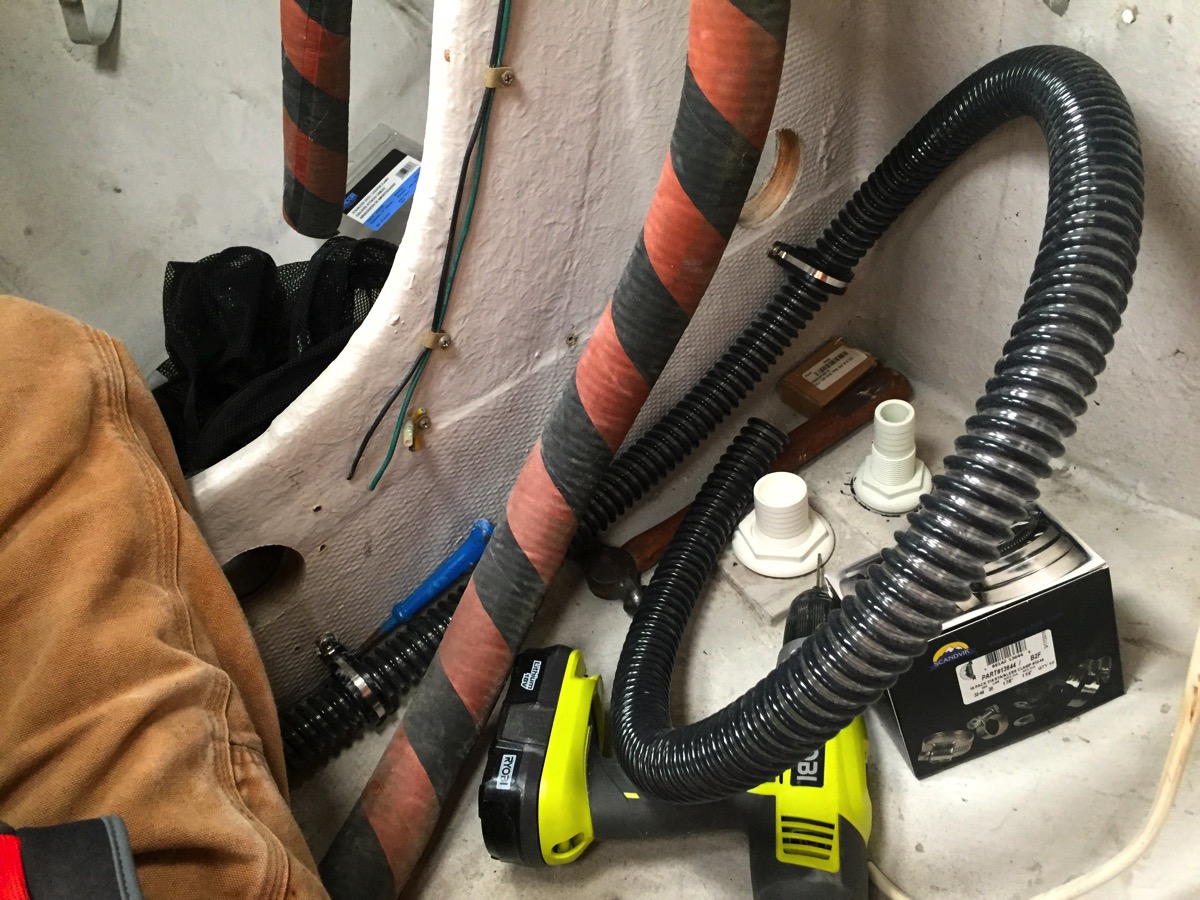
Tight fit


Sunday, March 27, 2016

Planning takes more time than I thought.

Still working on the new and upgraded bilge pump systems. After measuring and climbing underneath the cockpit a week ago I started to finalize my thoughts about how to go about the project.

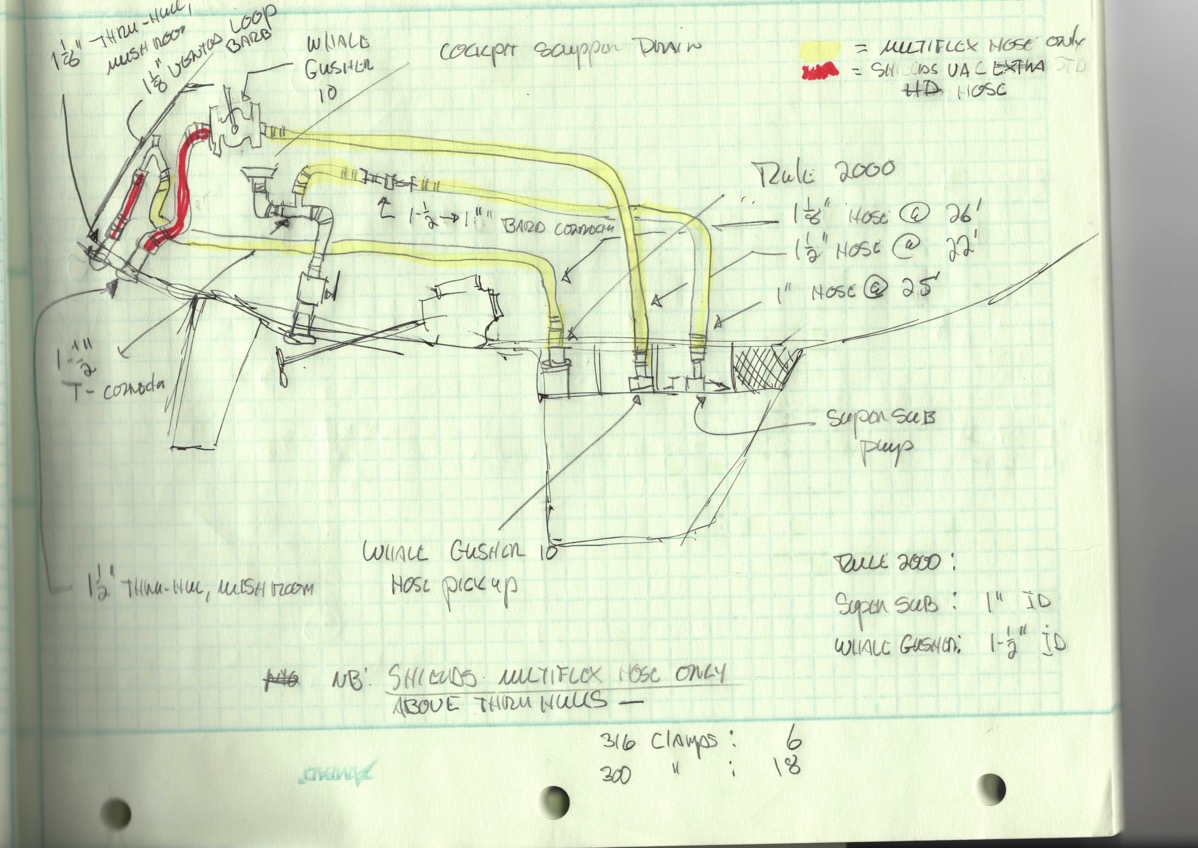
First thing that I knew I needed is a list of materials. I sat down and started with simple line drawings of the 3 basic systems and then got “creative” on the second iteration. In that plan I scoped out each length of hose and its diameter, any connectors and thru-hulls required, the pumps and types of hose clamps. After refining that a few times and finding simple mistakes I had my list of materials.

I gave the list to Charlie at the boatyard in the hopes that I could get some business steered that way but they had a hard time with some of the pricing. So I went out to some of my regular sources and started ordering. I should have most of the items this coming week.

On thing’s for sure, I going to have a good bit of bilge hose left over. In one case it was cheaper to buy an entire single 50’ roll for about 22’ and in another the 50’ roll price was exactly the same as buying 26’, each on a per foot basis. Maybe I’ll have some use for that hose in the future.

Not to scale:

Rough Plan

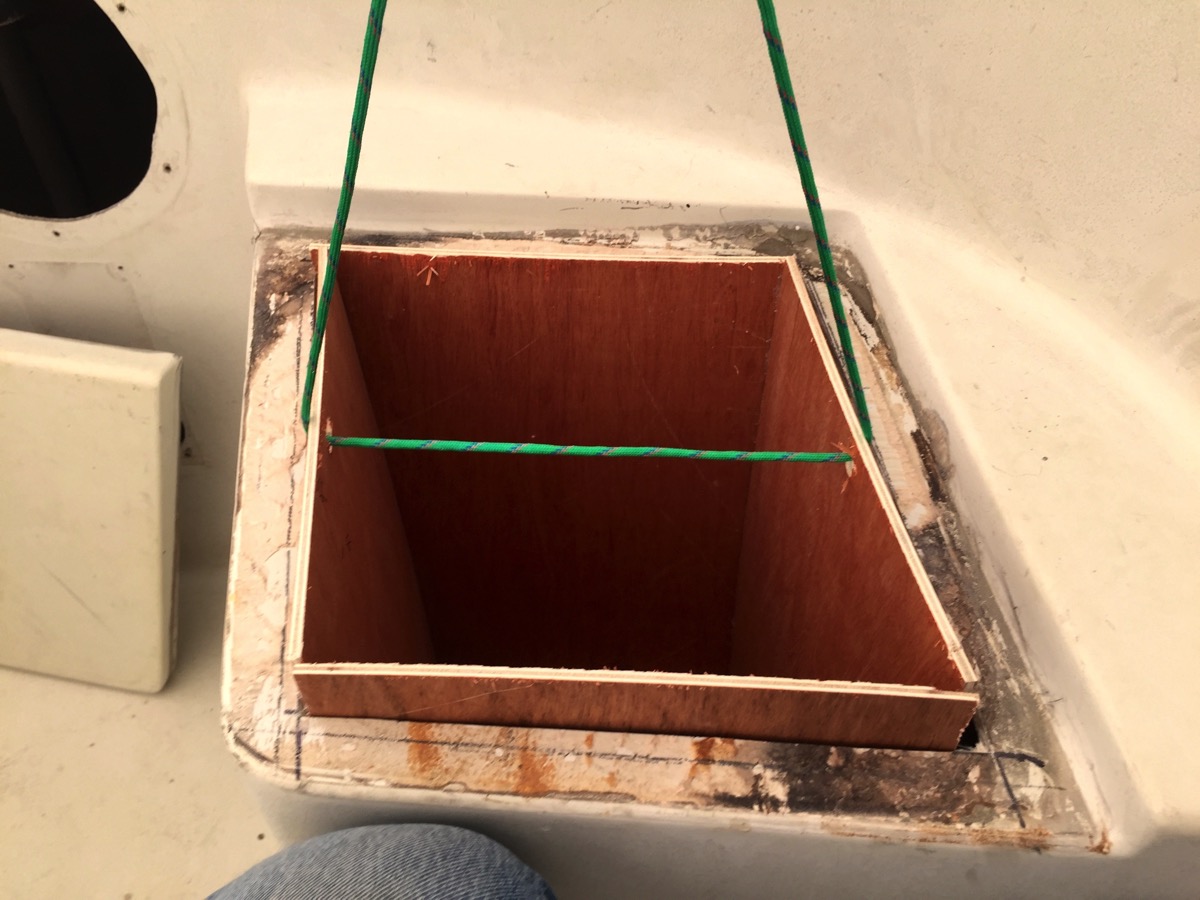
From there I returned to the new storage under the port helmsman’s seat project. I cutout and hot-glued together a box section of 1/4” luan plywood and gave it a quick test fit. It fit, perhaps even a bit loose. Once I was convinced of the feasibility of the modification I ordered up some 3/16” thick FRP sheet stock from McMaster-Carr. That order will show up this coming week also.

Crude but effective:

Scratch built

Slots in nicely:

Don t drop it

The real planning effort, one that I have rolled around in my head for quite some time without any great ideas springing forth is the hardware and rigging updates for the decks. This has to be done before I can start painting the decks and I’m pushing to get that going sometime in late May.

The boat has had a really jury-rigged setup for years and I’ve told myself that I would make it right. The problem is that I am not a really good “ideas” guy with it comes to this sort of thing. I’ve worked with pros and it’s clear that I’m not one.

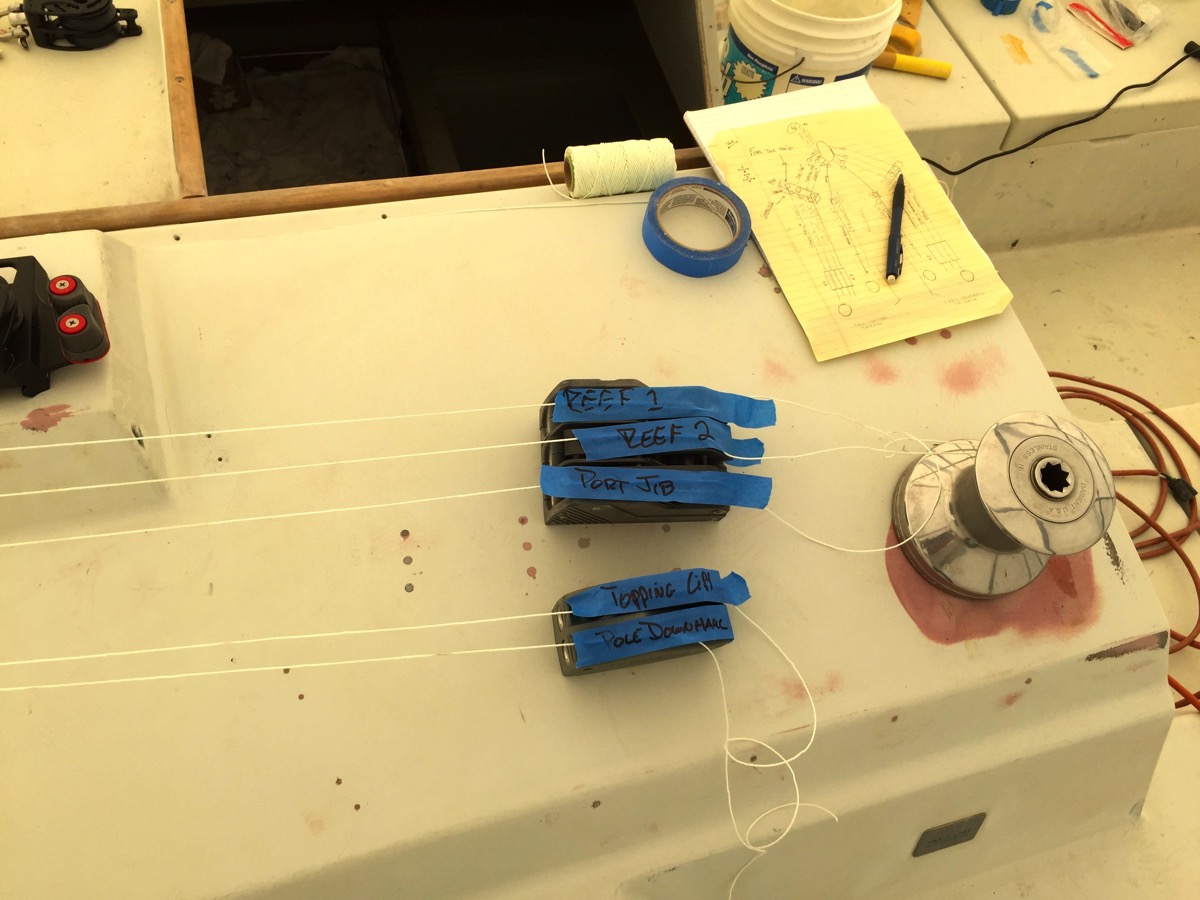
One of my primary goals has been to reduce the number of lines led aft to the cockpit in an effort to reduce clutter. As I’ve said, we don’t race this boat so quick and efficient line-handling isn’t critical. I was hoping to go from four cabin mounted winches down to two. That idea didn’t survive the hours I spent moving loose hardware around and running string to simulate line runs.

In the end, it was clear that I would need to bring the old Barient non-self tailing winches back to their original placement. And here’s the best part, I now have even more lines led aft. Clever...

Just keep at it:

Spider webs

Tape solves everthing

Old winch with blue tape

The way it was

After taking notes on the layout I spent an afternoon working up a rough schematic of the lines and equipment needed. That forced me to undertake an inventory of all the hardware that I had on hand. Some of it came off the boat and some was sitting in boxes in my shed.

Hope I didn’t cross lines:

Keep the costs down

Original hardware from the factory.

Unused old hardware

Some new and some newish:

New and old hardware

When I wasn't working on the boat project I did do some fun stuff.

Ninth Annual Sock Burning Party:

Socks burn nicely

Not quite 16 knots. Next time...

Fast is fun

Monday, March 14, 2016

Ramping up. But it's a low ramp angle...

Last Friday my wife and I took a day trip to the big city of Richmond to catch the Rodin exhibit at the Virginia Museum of Fine Arts before it moved on this week. It was, not surprisingly, very nice. We both agreed that the next time we go see an exhibit like that that we do some research before going.

Afterwards, to put a nice end on the trip we drove over to the new Stone Brewery. We’re beer snobs and have been to the original brewery in San Diego and loved it. Great surroundings, food and extremely good beer. Unfortunately the new Stone plant is still not running and the brewpub itself hasn’t even broken ground. They did have some inside and outside seating along with a small bar so we stopped for a beer. 

Saturday was the Smith Point Sea Rescue Oyster Roast which we always attend and donate money for. I was asked to join a few months back and I finally got my application in after which I went back to shoveling steamed oysters down my throat.

Sunday afternoon I did a few small jobs just to add a few hours towards knocking off the project list. In the morning I spent a few hours with a pencil and graph paper working up some ideas on creating storage under the port side helm seat. The more I thought about putting some type of soft pocket/bag hanging in the space the less I liked the idea. I was concerned about having a large hole in the cockpit that might allow large amounts of seawater into the hull if pooped or worse.

I decided that I would fabricate something out of FRP. More on that in another posting. But I did spend some time grinding off the filler that C&C used to glue it down. I also ground out the polyester and fiberglass laminate to give it more definition along the edge.

Bring out the brutal tools:

Filler removal

Ground out and ready

Casting about for a quick task to complete I spotted the two plywood shelves that support the 30-gallon fresh-water tanks and gave them a quick coat of white paint. I know that they will never be seen but I’ll feel better about it.

Fresh paint.

It will never be seen

Before heading off to dinner I put the final coat of satin varnish on the small v-berth ledge teak and holly cover.

Today, after getting back from the YMCA I drove the tool truck to the yard to do some planning and mockups. One thing that I wanted to do is install a secondary larger automatic bilge pump for use in the event of a large amount of water ingress. Hopefully never needed.

The current setup is a manual Whale pump located next to the wheel in the cockpit which exits a though-hull in the port side counter. The new Whale low-profile, low volume pump I’m ordering will continue to dump into a “T” fitting in the starboard cockpit scupper drain the way the original bilge pump did. With the new larger pump I want to run it aft and have it dump out just above and in line with the manual bilge pump through-hull.

Despite having misgivings about the hose exit being very close to the waterline and underwater when powering at speed which is not recommended because of the possibility of back flow into the bilge, I decided to go ahead with the plan. My friend who runs the yard felt that it would fine with a tall loop up to deck level with an anti-siphon vented loop installed.

Whale Pumps says 12” minimum with NO submersion:

Doesn t meet minimums

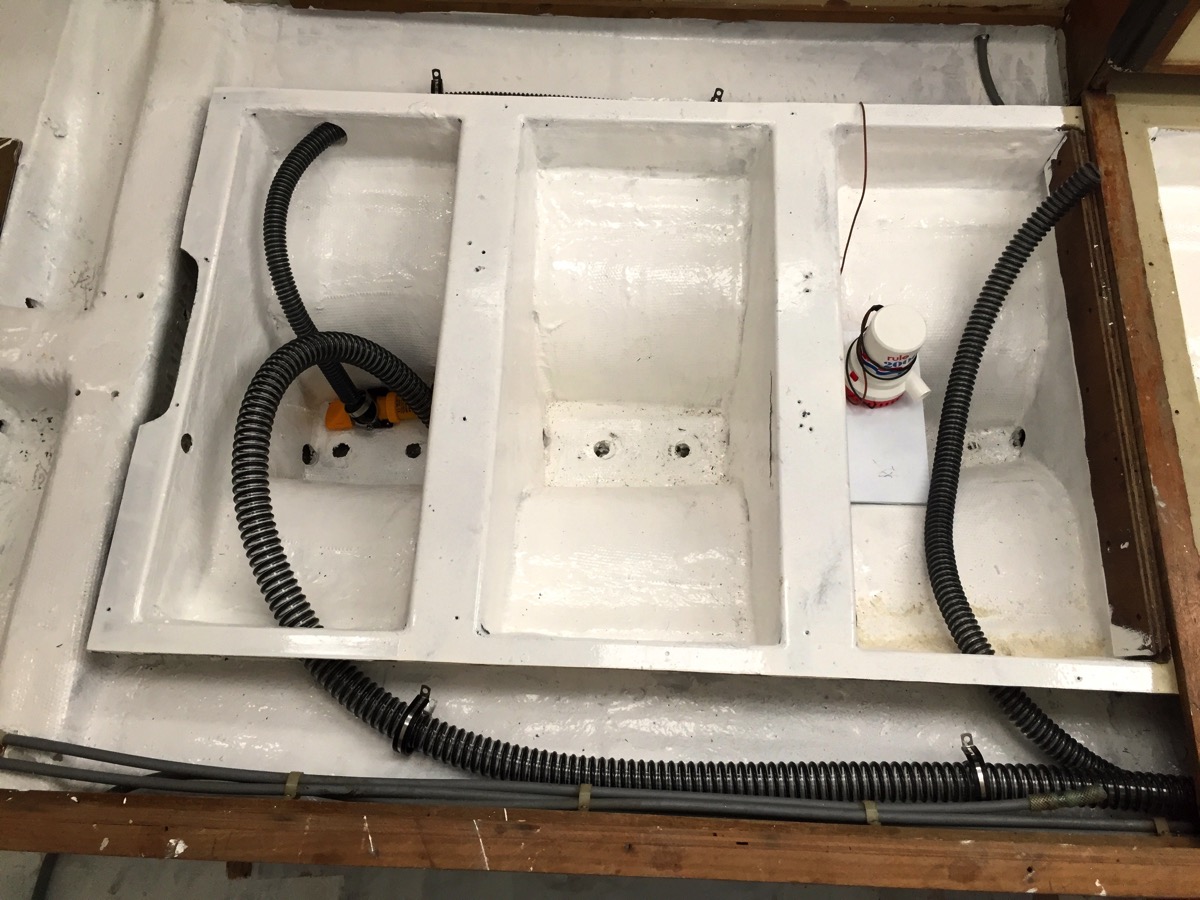
So, I started crawling around underneath the cockpit and measuring. Along with a new through-hull I’ll need around 26’ of hose. I have a couple of Rule 2000 GPH pumps in the shed so I brought one along to figure out the placement. It will be higher in the bilge so that it only switches on when the water is well up.

Height and location works well:

Fits nicely

I’ll need to make the shelf removable to allow for easy access to the keel bolt. I’m pretty pleased with the location though.

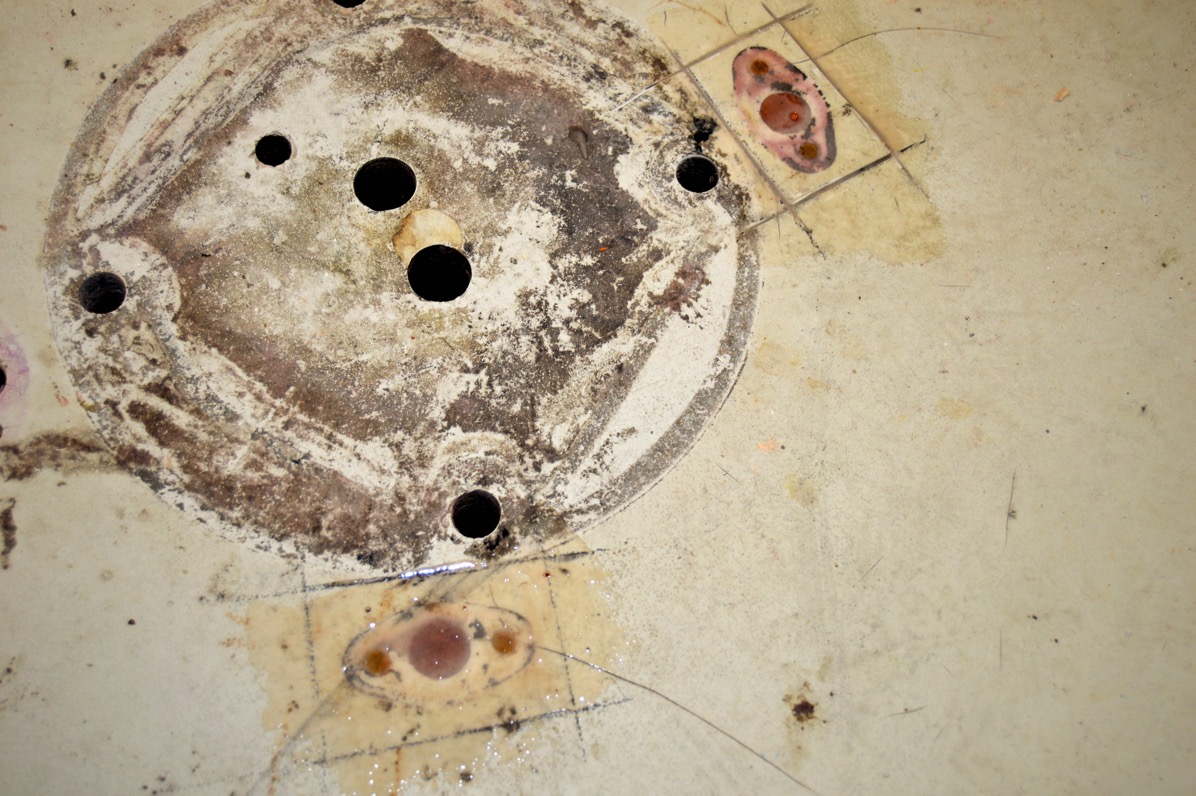
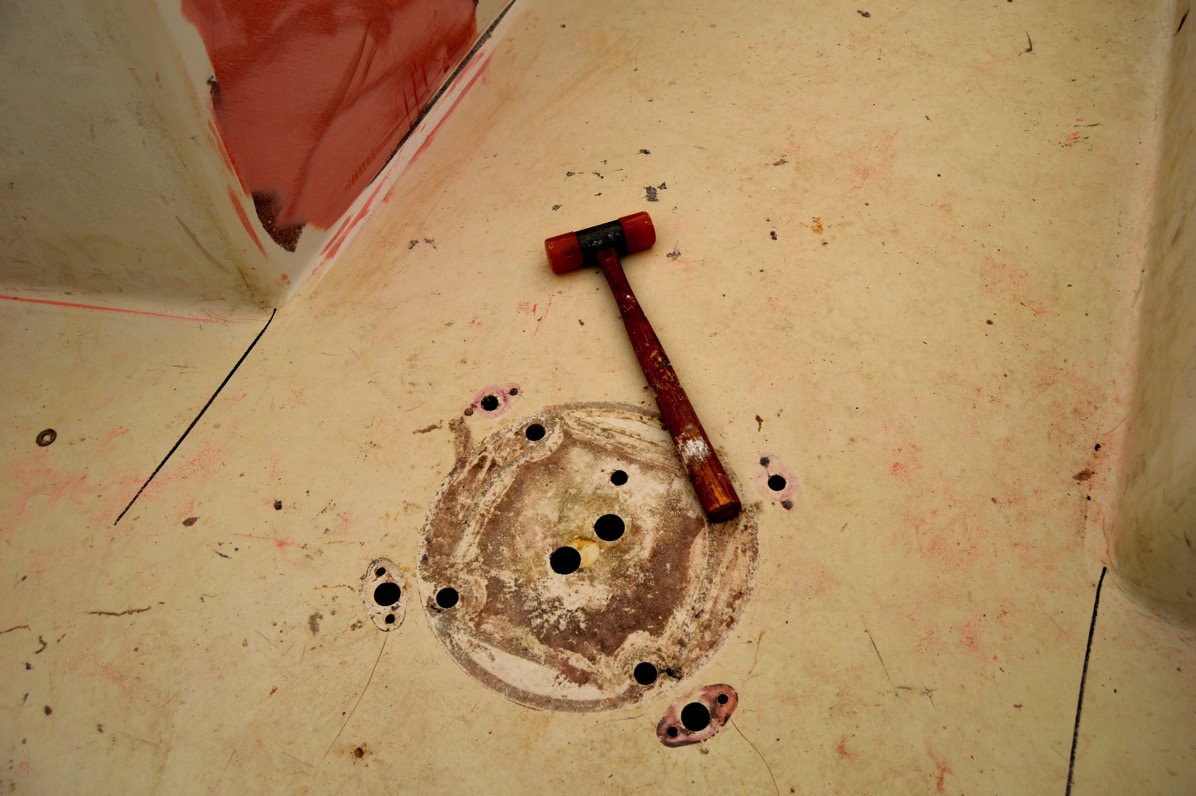
After getting that task documented, I turned to the pedestal holes in the cockpit sole that need to be closed off. Even though the sounding indicated no softness I somehow convinced myself that the area around the holes should be removed and re-glassed.

Well, that was a dumb idea. After cutting the starboard side and have to pry the laminate off, which essentially broke as I did, I realized that all I need to do was plug the holes and keep going.

Not balsa core but quite dry.

Seemed like the right thing

Not Balsa but dry

I pulled out the West System and mixed up a small amount with colloidal silica to thicken it, found some 3/4” and 1/4” wooden dowel material and put it all back together.

Quick fix for now.

Plugged and epoxied

Later this week I will come back and grind out the area and apply some fiberglass cloth just to make sure that it is tied together and closed off. I expect that I will soon start sanding the non-skid in the cockpit in preparation for painting the decks so no harm, no foul...

Thursday, March 10, 2016

So, where did I leave off?

Oh yeah, back to boat work.

I thought that with the fancy boat shed I would be able to get a fair amount done in the dead of winter. Not so much. A week in the Dominican Republic doing our regular medical mission volunteer work only to come back to the Great Mid-Atlantic Blizzard  and then quickly getting on a plane for another week and a half of sitting on a beach in Florida pretty much ruled that out.

February was just too stinking cold, windy and wet. All I did was check on the boat shed to make sure that it was still there and keeping Ronin dry. Which it was and did admirably.

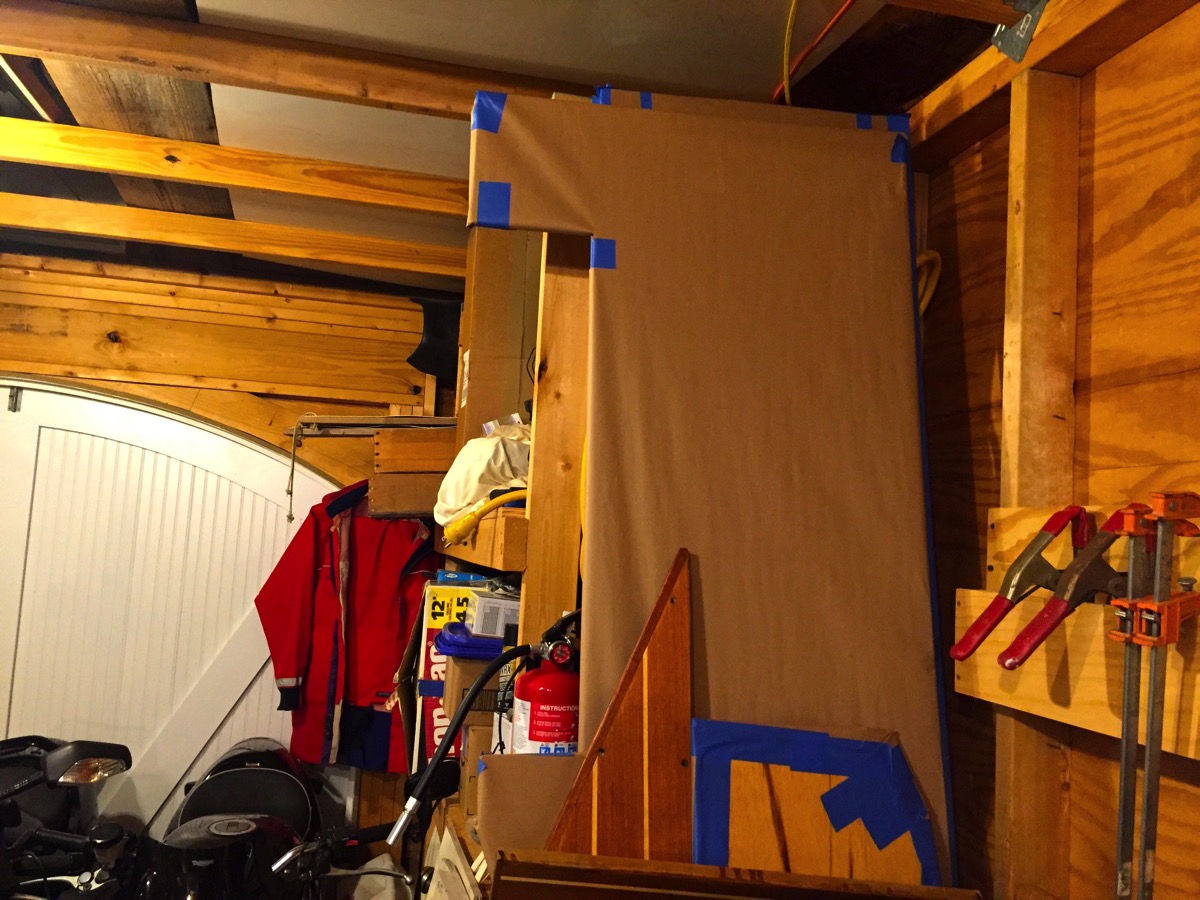
I would occasionally fire up the heaters in my backyard shed and do some small woodwork and varnishing on the final odd pieces of the cabin sole. Tomorrow I will put a final satin finish coat on top of the last piece that goes on the v-berth step, wrap it in construction paper like the rest of the cabins sole, set aside and be done with that project task.

Last bit of cabin sole work:

New V Berth Step

Cabin soles ready to install in some future date...

Wrapped and warm

The past two days have seen near record breaking warm temperatures here on the Chesapeake Bay so I, like many others in the boatyard, got back to work. The first day I did some administrative work, mostly thinking about what tasks to get started on this spring.  I did a quick survey of the mast and took notes for when I get together with a local rigger.

Another item that needs to get started is installing a small capacity bilge pump. I’ve pretty much decided to go with one of the new Whale Supersub Smart low-profile bilge pump. It is not intended to move large amounts of water, rather, to just keep the bilge dry during normal conditions. I worked up a quick wooden mockup to ensure that it would fit in my small, narrow bilge. The good news is that it should fit nicely. I was concerned that it might not fit with the keel bolts.

Replace with the real deal.

Small Bilgepump Mockup

I have not done any sanding or prep work in the cockpit for the upcoming deck painting because I knew that it would be a high traffic area. A lot of dirt and grit gets carried onto the boat so I wanted to wait until the last moment to start in on the task. I have spent quite a bit of time worrying about having a soft balsa core in the cockpit and that I would need to completely rebuild that area.

I spent some time sounding the entire cockpit sole in minute detail today. My ears a still ringing from that effort. But, the really good news is that there is no wet or rotten balsa. Both the sounding and a visual inspection from underneath verified that it is strong. That was a great relief and means that I can “save” at least a month’s worth of work that would have been required to replace the core and fiberglass.

Solid.

Balsa core sounding

I will need to seal the aft-most two openings that carried the throttle and shift cables when I install the new Edson Classic pedestal that is in the shed. Amazingly the core that was exposed around the holes drilled in the cockpit sole was dry and solid.

Quick verification.

Dry fit new pedestal

While I was at it I applied more AwlFair to the old cockpit/quarter-berth opening on both sides. Standard apply and sand off process. A previous owner had slapped a gob of filler of some sort on the aft bulkhead and it kept bugging me so I sanding it down and faired it too.  I should be done with this job in the next few days.

Pastels:

Old Port Repair V 2 0

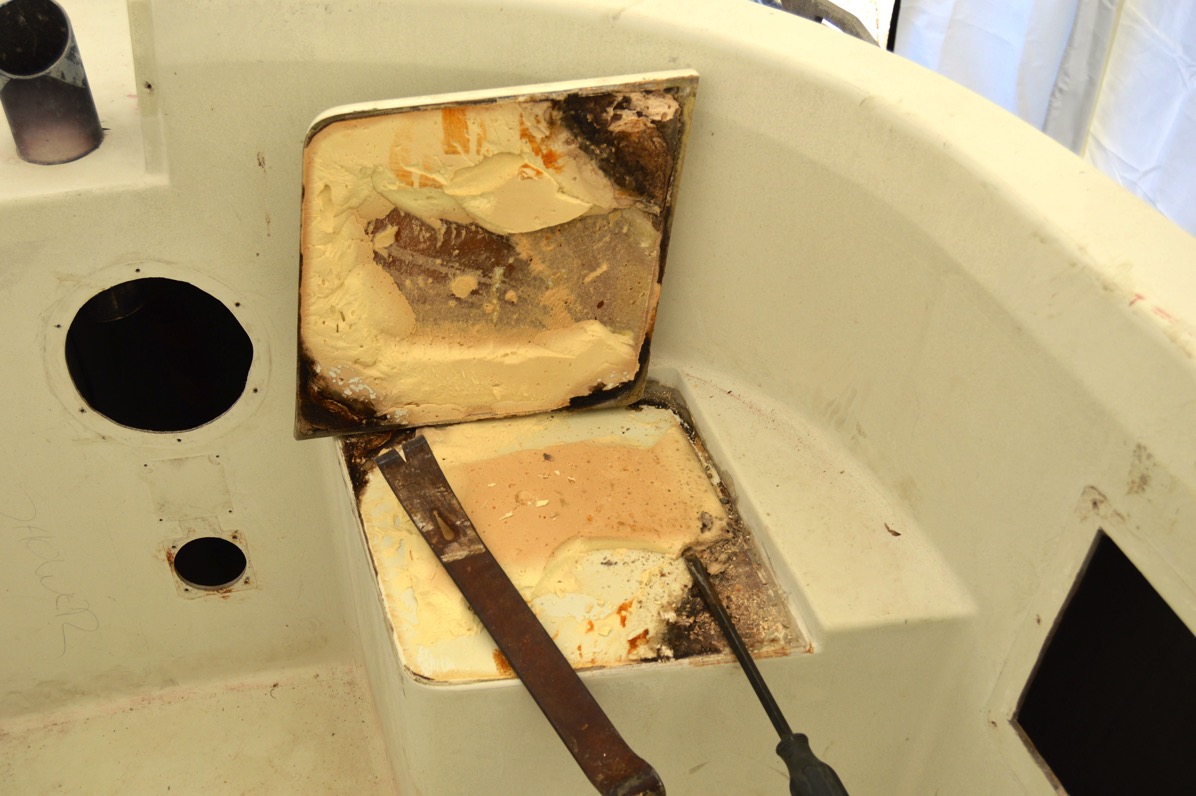
And since I was on a roll, I started to think about doing something with the area underneath the port side of the cockpit driver’s seat. It may have been an option from the factory to put a hinged lid over some sort of storage like  the propane locker on the starboard side but on my boat is was simply glued downed.

So, using tools that usually get me in trouble, I decided to investigate. Fifteen minutes later I had my answer.

Not subtle.

Don t Break It

C&C “stuff:"

Off in one piece

I’m going to work up some sort of storage underneath this. Most likely a removable soft pocket of some sort. TBD.

Looks like an one-hole outhouse...

Starboard pit toilet

Oh, and I did some Frostbite racing in Annapolis last weekend and yesterday put on some shorts and went sailing with my good friend and home builder Vincent on his Corsair 24. Fun.

First Sail 2016Early start.

Tuesday, December 29, 2015

Getting the bilge ready.

I’ve been mostly working on small things for the refit, finishing odd pieces of the cabin sole that need special attention, applying the final coats of satin finish over the coats of gloss AwlWood to the large cabin sole sections. When those were complete I wrapped them in construction paper and put them up for storage in shed.

The Butler skiff had been sitting on sawhorses at the Railway. I decided that rather than splash it, drag it back to the slip and worry about keeping it floating over the winter that I would just store it there. The yard owner fell 6 feet of a strong-back the broke and was out of commission for a week or so. This week we moved the boat, flipped it over and I wrapped that up for the winter too.

All it needs is a nice red bow.

Snugged down for the winter

Before Christmas I spent some time cleaning the bilge. Originally I thought that I could get it ready to paint by simply scrubbing the 33 years of crud using household cleaners and a stiff brush. I was disabused of that idea pretty quickly. So, my fallback method was to bring out the heavy equipment. The power washer. I picked a day that was raining, put on old foul-weather gear and after cleaning with Simple Green and letting it work a bit, I started in.

Not a job to be taken lightly. I blew crud and crap all over the boat. But, it did the trick. There was dirt, dust, old stainless steel hardware and fiberglass bits that came out of every crevice in the hull. I crawled down into the cockpit locker and cleaned the seldom seen areas around and behind the rudder and quadrant. It took 3 days just to dry out properly. 

After that I spent 3 days sanding, grinding and scrapping old paint and caulk. Another afternoon spent washing all the surfaces with thinner and I was pretty much ready to go. I took one day to tape up all hoses, lines and exposed surfaces.

Today I donned my Tyvek coveralls and went to work with rollers and brushes. Not an easy job because I had to spend most of my time on my knees and bent over. At the end of the day I had one coat applied.

Getting started.

First coat start

First coat on and drying.

First coat done

Will need second coat

I may have mentioned in another post about the interesting boats in this yard. A “unique” sailboat showed up a week ago. I was intrigued and walked around it admiring it for a good 15 minutes before it dawned on me what it was. A “modified” Cal 25. I used to own and race one in Annapolis. Stunning.

Years ago I was fortunate to be able to do a tour of a Cal 40 being completely rebuilt and upgraded for racing with the late designer Bill Lapworth. He was firm about the reasons for some of his design elements and felt that changing them might be a bit of overkill. He would not have approved of this change.

Somewhere in Heaven Bill Lapworth is weeping...

Pirate Ship

Monday, November 30, 2015

Clean, plan and move forward...

Ronin deserves better.

It has been better than a year since she was given any attention other than painting, sanding, unscrewing bolts and running wires. And in the time, she has slowly acquired a patina of dirt, mold and just plain scum. In my zeal to keep working on the “big” projects and get them done, I had not really notice how run-down and tired she had become. I think she was trying to tell me that the project was more about me than her.

I work on Ronin in a boatyard that had more than a few abandoned boats that were chopped up, sent to the landfill and quite a few more that although the yard fees are being paid, it is pretty clear that those old boats are probably never going to see the water again. You can see it and feel it when walking around the yard. They’re faded, tattered and covered in a faint verdigris. Projects started and then stopped with a hasty cover thrown over the work with what I am sure is a resolve to get back to it in the spring. But it doesn’t seem to happen.

That is one of my biggest fears. That I will get to a point where I walk away from an unfinished project. I’m not cowed by the costs, the labor involved or the technical difficulties. I’m not fazed by the shear scale of the project.

I fear that I will just lose the drive and the concentration necessary to complete the refit.

But I have a partner is this effort. He’s been with me for years and is aways on the boat waiting for me to show up and get back to the tasks at hand. He’s fearless. He doesn’t take No for an answer and he certainly isn’t sentimental. When I see him, I smile and get back to work.

“Salty” the croc...

I m watching you

So, the other day I downed power tools and sandpaper and picked up a bucket, brush and cleansers. After doing yet another vacuum of the boat I scrubbed down the entire interior. The fiberglass liner that I had painted was showing dirt and spots from the wasp “ejecta”. The melamine covering the cabinetry was covered in large swatches of mold. The teak paneling was growing a new species of moss as near as I could tell.

It took two days to get it nice again. A huge difference in feel just going below despite the fact that with everything removed it looks like an industrial site.

Brighter.

A wash is good


Clean aft

When I was done with the cleaning I moved on to next important item. Project planning. This is where I will fall down and not complete this project if it is not updated and followed. The refit will become just another random set of chores with no completion.

I’ve been focusing on the larger effort required to get the decks ready for painting this coming spring. That’s pretty simple on a day-to-day level; grind, fill, sand, fill, sand, etc., etc.

But as that effort is starting to wind down, I need to focus on the remaining large tasks and what can be achieved during the winter months. I sat down at the nav-station with my notes, project plans and Salty to work on a list of jobs that could be worked on in the colder weather. 

After that effort I’ve got a nice list of items and a renewed sense of where to go and what to get done in the next 3-4 months.

Paper technology

Work continues.

'Glassing in the quarterberth port

Thanksgiving with my family and a few doctors visits. Just part of the schedule when trying to get time to work on the boat. All of those events took me away from Reedville for several days. Driving to and from Washington, D.C. can be tiresome. And I will be going back in a few days for some minor out-patient surgery.

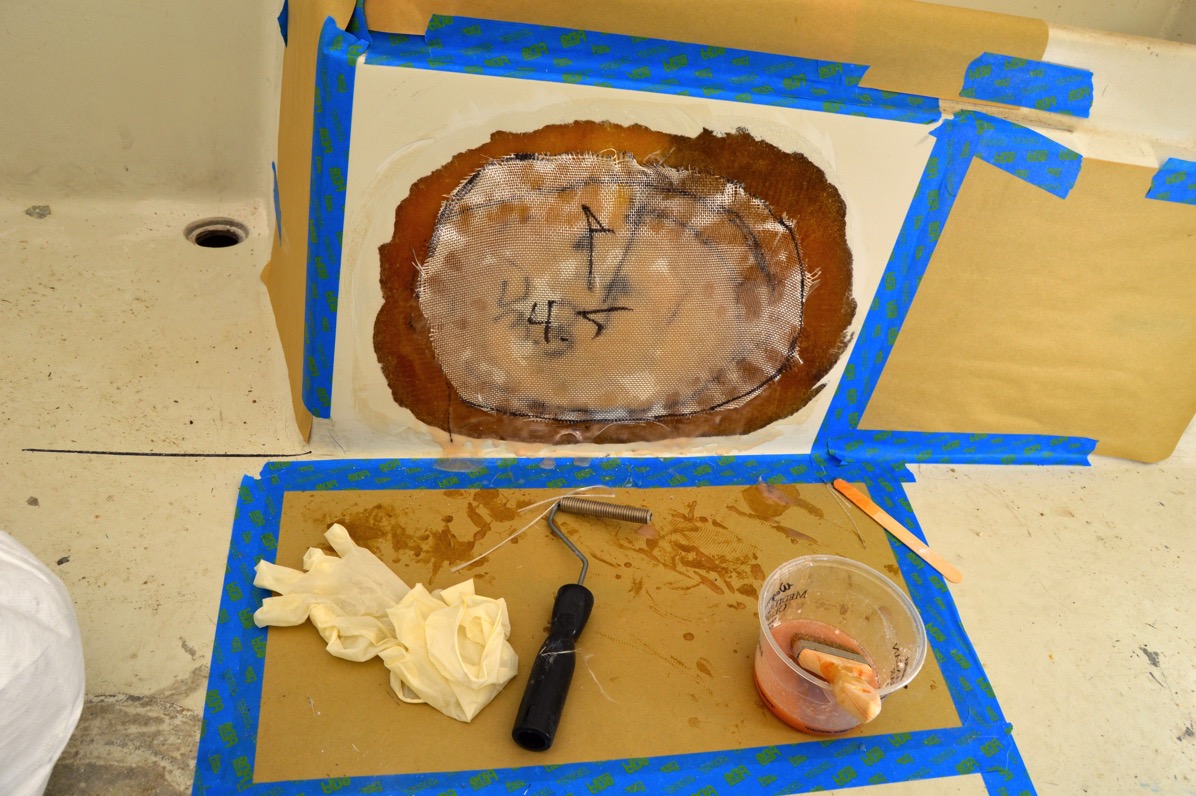
In-between the interruptions I continued work on filling in the old round port providing ventilation to the quarter berth. I cut up some layers of 17 oz. biaxial cloth to fit the diameter of the opening and epoxied them in place. From there I used the plastic template I had created some days earlier to cut up successive layers of 6 oz. woven cloth. These were epoxied into place until the entire area was built up.

Plug it and cover it.

Glass mat plug

Yes, still more wetting out to be done...

Old port layup

Pro tip: don’t use paper or tape for the epoxy overrun. The epoxy just ignores it and sets up on the glass anyway. And I knew that prior to taping it up. Dummy at work yet again...

I put a heat lamp on the whole thing and let it set up for the day.

The next day I came back and started in on sanding the hardened epoxy. After a quick wash to remove the amine blush I did a a couple of passes with the 5” grinder and the 6” sander. Despite my weak fiberglassing skills the layup was nice and fair with virtually no high spots that needed working down.

Ready for AwlFair.

Old port layup sanding

I grabbed the vacuum to remove any dust and then washed the entire area with acetone. After mixing up a batch of AwlFair and troweling it on, I was done with that for the day.

I love AwlFair...

First coat AwlFair

I took a quick trip to the bow and sanded the last AwlFair application near the forward part of the anchor locker and it is ready for priming when that occurs next Spring.

Done enough.

Anchor damage ready for primer

When I came back next I discovered the limitations of PeelPly. I had considered just using plastic between the wood backing plate and the epoxy buildup. I should have.

The wooden plug was firmly fixed in place. If it had been in a more accessible location it would have been fairly easy to remove. It was not.

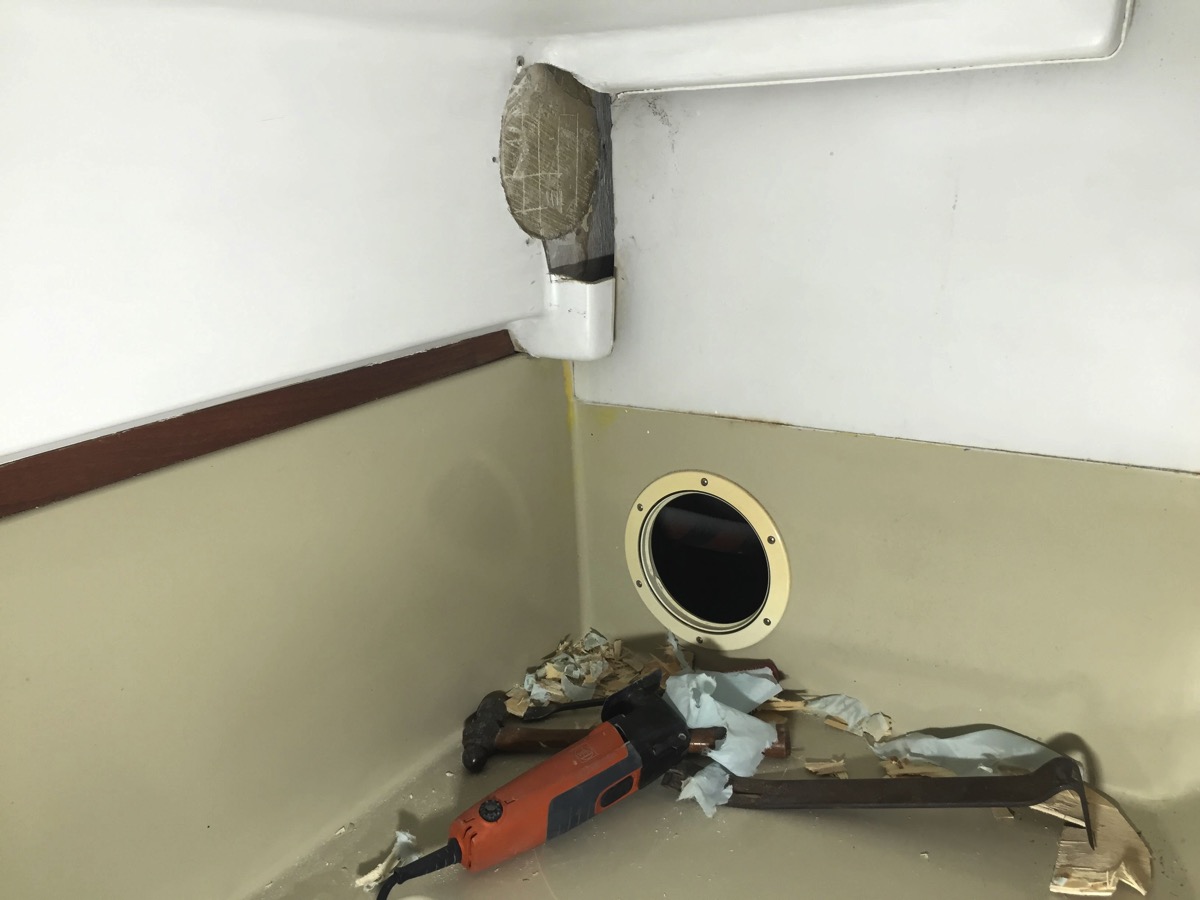
So, breaking out the “Wonder Tool", my Fein Multimaster I was able to cut and pry the plug out in small bits. Ultimately it was notas onerous a task as I had envisioned.

Bits and pieces.

PeelPly has limitations


Favorite tool deals with it

And since I had it ready I changed the blade and chopped off the wooden dowels I used to plug the old winch holes on the cabin top near the cockpit when filling them with epoxy.

Eh, no one will see it.

Cut off the bungs

After some sanding with the 6” Mirka DA and some of board filing I applied another skim coat of AwlFair.

Break out the heat lamp again.

Heat rays