Showing posts with label Bad Ideas. Show all posts

Monday, March 14, 2016

Ramping up. But it's a low ramp angle...

Last Friday my wife and I took a day trip to the big city of Richmond to catch the Rodin exhibit at the Virginia Museum of Fine Arts before it moved on this week. It was, not surprisingly, very nice. We both agreed that the next time we go see an exhibit like that that we do some research before going.

Afterwards, to put a nice end on the trip we drove over to the new Stone Brewery. We’re beer snobs and have been to the original brewery in San Diego and loved it. Great surroundings, food and extremely good beer. Unfortunately the new Stone plant is still not running and the brewpub itself hasn’t even broken ground. They did have some inside and outside seating along with a small bar so we stopped for a beer. 

Saturday was the Smith Point Sea Rescue Oyster Roast which we always attend and donate money for. I was asked to join a few months back and I finally got my application in after which I went back to shoveling steamed oysters down my throat.

Sunday afternoon I did a few small jobs just to add a few hours towards knocking off the project list. In the morning I spent a few hours with a pencil and graph paper working up some ideas on creating storage under the port side helm seat. The more I thought about putting some type of soft pocket/bag hanging in the space the less I liked the idea. I was concerned about having a large hole in the cockpit that might allow large amounts of seawater into the hull if pooped or worse.

I decided that I would fabricate something out of FRP. More on that in another posting. But I did spend some time grinding off the filler that C&C used to glue it down. I also ground out the polyester and fiberglass laminate to give it more definition along the edge.

Bring out the brutal tools:

Filler removal

Ground out and ready

Casting about for a quick task to complete I spotted the two plywood shelves that support the 30-gallon fresh-water tanks and gave them a quick coat of white paint. I know that they will never be seen but I’ll feel better about it.

Fresh paint.

It will never be seen

Before heading off to dinner I put the final coat of satin varnish on the small v-berth ledge teak and holly cover.

Today, after getting back from the YMCA I drove the tool truck to the yard to do some planning and mockups. One thing that I wanted to do is install a secondary larger automatic bilge pump for use in the event of a large amount of water ingress. Hopefully never needed.

The current setup is a manual Whale pump located next to the wheel in the cockpit which exits a though-hull in the port side counter. The new Whale low-profile, low volume pump I’m ordering will continue to dump into a “T” fitting in the starboard cockpit scupper drain the way the original bilge pump did. With the new larger pump I want to run it aft and have it dump out just above and in line with the manual bilge pump through-hull.

Despite having misgivings about the hose exit being very close to the waterline and underwater when powering at speed which is not recommended because of the possibility of back flow into the bilge, I decided to go ahead with the plan. My friend who runs the yard felt that it would fine with a tall loop up to deck level with an anti-siphon vented loop installed.

Whale Pumps says 12” minimum with NO submersion:

Doesn t meet minimums

So, I started crawling around underneath the cockpit and measuring. Along with a new through-hull I’ll need around 26’ of hose. I have a couple of Rule 2000 GPH pumps in the shed so I brought one along to figure out the placement. It will be higher in the bilge so that it only switches on when the water is well up.

Height and location works well:

Fits nicely

I’ll need to make the shelf removable to allow for easy access to the keel bolt. I’m pretty pleased with the location though.

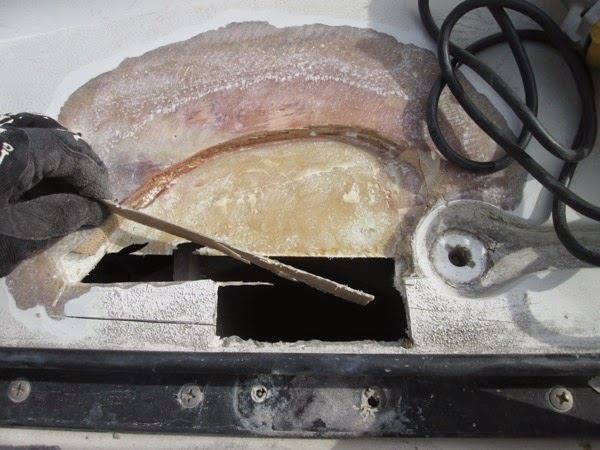
After getting that task documented, I turned to the pedestal holes in the cockpit sole that need to be closed off. Even though the sounding indicated no softness I somehow convinced myself that the area around the holes should be removed and re-glassed.

Well, that was a dumb idea. After cutting the starboard side and have to pry the laminate off, which essentially broke as I did, I realized that all I need to do was plug the holes and keep going.

Not balsa core but quite dry.

Seemed like the right thing

Not Balsa but dry

I pulled out the West System and mixed up a small amount with colloidal silica to thicken it, found some 3/4” and 1/4” wooden dowel material and put it all back together.

Quick fix for now.
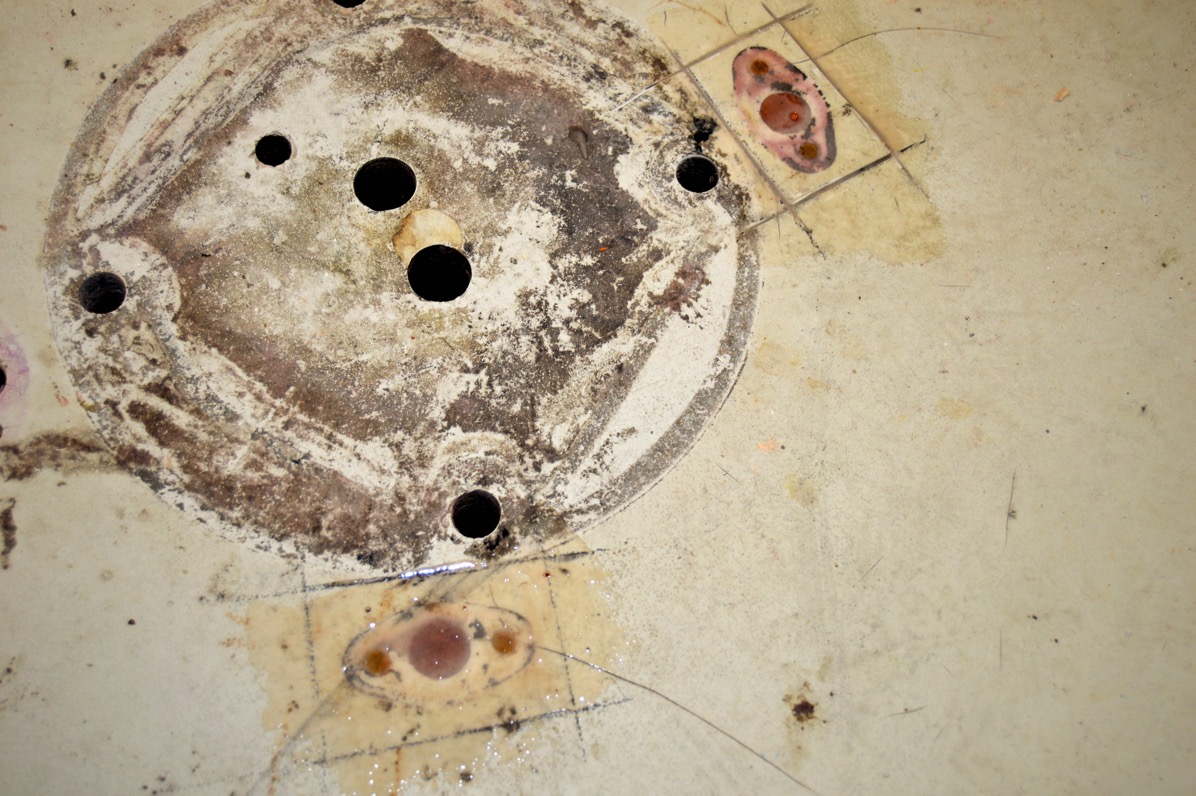
Plugged and epoxied

Later this week I will come back and grind out the area and apply some fiberglass cloth just to make sure that it is tied together and closed off. I expect that I will soon start sanding the non-skid in the cockpit in preparation for painting the decks so no harm, no foul...

Thursday, June 4, 2015

Slotted screws: A Rant.

Back to the boat in yet more rain this morning. We’re easily looking at eight inches in the past three days. The shed is paying for itself.

Today I went back to getting the last of the ports out of the deck. I started with the two Beckson opening ports in and across from the head. I replaced the originals 15 years ago because they were toast. They came out quite easily that time. This time around the sealant had good grip on them. I destroyed my replacement starboard hatch in the removal process. The port side hatch came out much easier but that was mostly due to “learned technique” from wrestling with the starboard port. Didn’t really matter as I’m going to replace both of them again after the decks are painted. Dirty sock on clean feet or is it the other way around?

After getting those out I moved aft to the cockpit to remove a Beckson screw-in deck plate that the PO, affectionally know as Mr. Potato Head had brutally installed to provide ventilation to the quarter berth. Every time I see that job it reaffirms my strong desire to replace it with a Lewmar opening hatch.

After unscrewing the hazy clear port I started to unscrew the machine screws and nuts. In the original installation the port was installed with 5/16 “ x 18 S/S machine screws. That’s fine but they used slotted screw heads. I hate slotted screw heads. Really hate them. They should be banned. Outlawed.

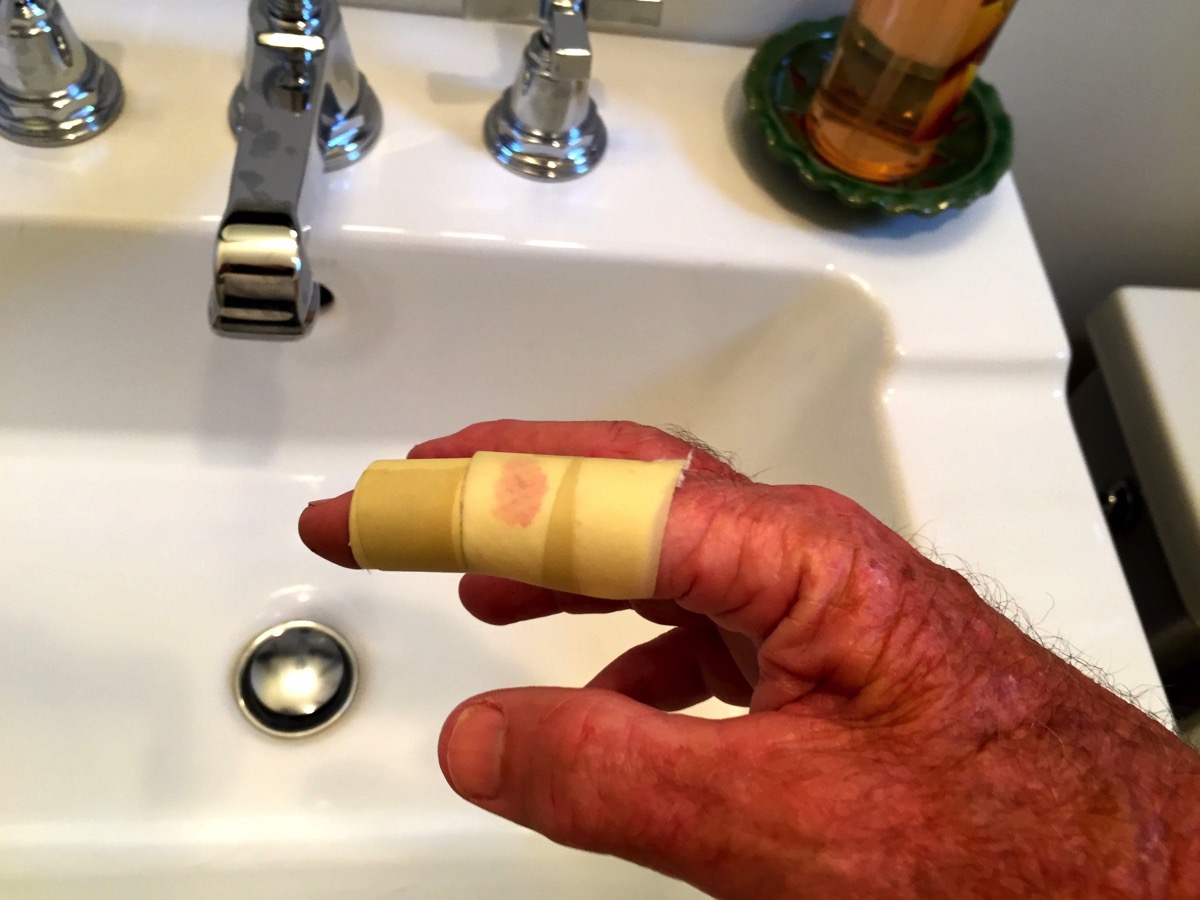
I was thinking how much I hated them right about the time that the drill-driver slipped off the head and caused me to rake my finger across the flat-head slotted screw head. Yup, it hurt. And it opened up a 2” laceration that was pretty impressive.

Well, that stopped work for the afternoon. A piece of white (sterile?) box-o-rag, some ever present blue tape and I was able to keep from bleeding on the decks. It also reminded me that our house had nothing other than bandages suitable for a minor nick.

After a trip to the nearest, and that’s a very relative term, pharmacy I was back on the road.

Okay, end of rant.

A yard worker’s first-aid kit:

IMG 5111 

Less bleeding than I would have imagined:

IMG 5114

Amazing what you can do with a paper towel and 3M fine-line tape:

IMG 5117

Anyway, more pictures of me destroying perfectly good opening ports.

Unusable:

DSC 0003

Usable but still going in the waste bin:

DSC 0006

Also of note: The Annapolis to Newport Race got underway today and as of this post, the fleet is nearing our house near Smith Point Light. There are three “vintage” C&C’s of the same era and design as Ronin in the race. They are doing well and I hope they sail fast, collect lots of trophies and most importantly, have a safe race.

Sunday, February 1, 2015

In the shed, Week 1.

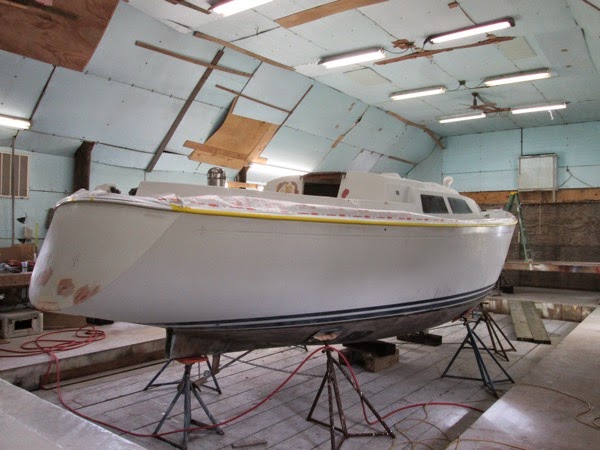
The hull has been in the shed for a week now and Charlie has started in on prepping the hull for painting. When we realized that removing the vinyl rub-rail was pretty much a non-starter, he ran a buffer with mineral spirits along it and despite some cuts and gouges it cleaned up pretty nicely.

The next step was a complete wash of the hull using Mean Green. Afterwards Charlie started taping the boat. Before he completed that I needed to get below the cockpit to look at the layout of the bilge lines and the cockpit scupper drains. This has been an area of annoyance for me since we bought the boat. The main bilge line using the manual Whale pump next to the wheel in the cockpit exits on the port side underneath the stern. The smaller electric bilge pump line snakes up from the bilge, extends over to the starboard side and then “Tee'd” in the starboard scupper drain just above the thru-hull fittings.

When I replaced the replaced the thru-hulls and seacocks some years back, because of the extended height of the seacocks, the hose run from the scupper drains was not direct and had a small sump. Because of this water never completely drained and if there was any debris it often developed a clog. To make matters worse, C&C designed deck level drains with a narrow grove to channel the water to a small scupper drain that led to a 6’ length of hose that, again, did not drain directly downhill. While in theory this seemed a great idea, those drains never did. These lines “Tee’d” into the scupper drains too. A mess.

Up, down and around:

IMG 0881

Going forward I plan on doing three things: 1.) running the electric bilge pump line directly to a new thru-hull near the existing manual bilge pump thru-hull, 2.) capping the two small scupper drains in the deck and removing the lines and 3.) removing the grey polypropylene fittings and ensuring that the cockpit scupper drain hose run downhill and free.

The reason for not completely removing and glassing in the shallow groves is that if in the future the boat is used for cruising and I want to catch rainwater, they can be plumbed to the port and starboard fresh-water tanks using small valves to open the flow after all the contaminants have run off.

The drain and channel; nice idea in theory but...

IMG 0244  Version 2

Manual bilge line running aft:

IMG 0886

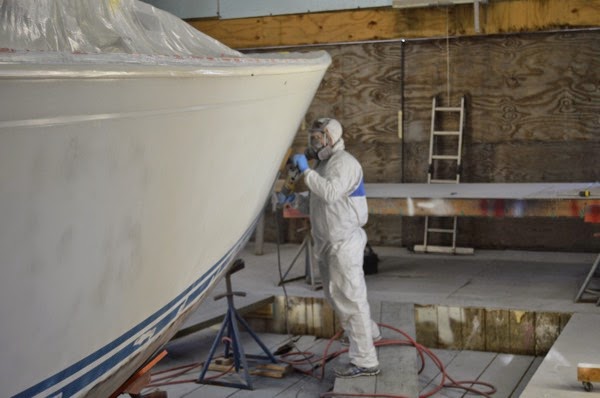
After I finished scoping all that out, Charlie continued taping the boat. Afterwards sanding started. He mentioned that the gelcoat was “hard” and that it was taking longer to sand and using sanding disks at a pretty high rate. Oh well. In addition to sanding he spent some time grinding out any cracks and irregularities that he came across.

Taping:

IMG 0892

IMG 0894

Sanding and grinding:

DSC 0031

DSC 0036

An area of resin deficient layup near the bow: 

DSC 0038

Thursday, November 6, 2014

Time Shift - Deck Repairs

Since I’m not posting on a continuum here, I thought I’d add a short post about what I found while doing some deck repairs. It was “interesting."

One of the former owners had done or had someone do some “quick” deck repair to the areas radiating out from the inboard ends of the stanchions that are used for the gates. On our boat we have gates port and starboard in line with the cockpit bulkhead. As stands to reason, as people, including me, grabbed them to haul themselves up or just to get aboard, the levering action seemed to have really put a lot of stress in that area. I assumed that the fix involved replacing core and adding fiberglass but that appears to not have been the case. It seems that essentially someone just ground out the stress cracks, filled them in and did a quick paint and non-skid cover.

Port side deck at lifeline gate:

IMG 0829

So after attacking the deck with my trusty grinder I discovered the good and the bad. 

The Bad: It seems that when C&C built the deck it smartly designed it so that the areas that are on top of the hull are solid glass. Good idea in theory. But what seems to have happened is that as the deck layup transitioned/tapered from the core areas to the solid glass areas, the overall thickness of the laminate became very thin. So what happened is that the area was prone to movement throughout. Constant springing whenever the stanchion was pulled on.

I would guess that the total thickness of the deck at the area where it overlaps the hull, just before and under the toe-rail to be at best 3/8” thick. In the area where there was still some coring, in this case some very thin foam, the bottom laminate layup was exceeding thin, maybe 1/16”.

Initial grinding and exposure:

IMG 0813

After cutting and removing the lower laminate schedule:

IMG 0824

So, the Good News: the core was dry! Even the plywood that was used instead of balsa core. Not sure if that was put in at the factory or if it was part of the initial repair. From the looks of it I think that the factory used plywood...

Anyway, I ground out the area on a 12-to-1 radius, based on the thickness of the top laminate layer, cleaned every thing up and formed sections of pre-made 1/4” FRP and epoxied them into place as replacement for the 1/2” balsa core.

First layup:

IMG 0827

While that section was curing, I moved over to the port side. Closer inspection lead me to believe that all that was compromised was the up level of the laminate that have a few stress cracks in it. It seemed to be a good bit stiffer that the starboard side so I decided to just grind out the area and re-glass it.

First look:

IMG 0830

When I was finished grinding and cleaning the area I cut sections of biaxial cloth along with as small section of 10 oz cloth and epoxied them into place.

Layout and epoxiing:

IMG 0835

IMG 0836

More to come after the epoxy sets up. Waiting for the rain to stop...


Saturday, November 1, 2014

A Major Step Forward - Hardware Removal

In early August I started in on removing the deck hardware from Ronin in anticipation of prepping the decks for painting. While the boat was in the slip I started removing winches, cleats, turning blocks, track and pretty much anything that was secured to the deck. A old work buddy of mine, John, was in town from Kansas for few days and made the mistake of volunteering to help me. I needed it as some of the removal required two people.

By and large the hardware came off fairly easily. C&C did a good job of mounting and bedding the hardware. With the exception of the secondary winches and some rope clutches that a previous owner and I installed, all the holes were chamfered and butyl was used for the bedding compound. I’ve been very surprised by the lack of water infiltration into the core. So far almost of all the items that I have pulled have not had any rotten balsa core. I was expecting quite a bit worse but this says good things for the quality that C&C put into the deck hardware build. I know I won’t get away free but this means a lot less effort getting the decks ready for painting.

Jib tracks coming off:

Jib Track Coming Off

When I pulled the hardware there were a multitude of holes in the deck which is to be expected. I didn’t want to plug the holes with a dollop of clear silicone sealant like I had with the coach handrails that were pulled off over a year ago. I've read about the problems that silicone causes when trying to clean and prep the surface for painting.

So, in the vein of “better ideas”, I decided that just taping over the holes with duct tape would be fine. Pure lazy think. It did not work, So, after the first rainfall (outside and in…) filled my bilge I belatedly decided to pull the tape. I had cleverly applied the black Gorilla tape in the late summer heat. Think gooey, sticky mess when removing the tape.

One of several bad ideas that I’ve had:

IMG 0245

So, much scraping and wiping down with mineral spirits later, I had another brilliant idea: West System! Yup, I figured that since I was going to be sanding, repairing, glassing and epoxying the decks for painting anyway, why not just fill the holes with West System epoxy thickened with 407 Low Density thickener. Many swiped with a plastic squeegee later I had a very dry boat. Ugly but dry.

Chicken Pox:

IMG 0504

After a couple of days of intermittent work I had the big items off and ready for storage. Most of the items will go in my shed but some will stay outside with the boom and other large aluminum and steel parts.

Bucket ‘o Winches:

IMG 0169

I set one of the primary winches aside and a few days later put it on my workbench to check it out. Yeesh, what an un-serviced mess. Shame on me. So after doing a check to make sure everything was there and working, I stored them for a future maintenance project inside the warm and toasty shed when it’s cold outside and boat work slows.

Badly treated winches:

IMG 0248

IMG 0251