Saturday, March 7, 2015

Week Six - No break in the weather.

It has continued to be unremittingly cold in the Mid-Atlantic. Snow and ice with sub-freezing temperatures in March. I’m well tired of it...

DSC 0124

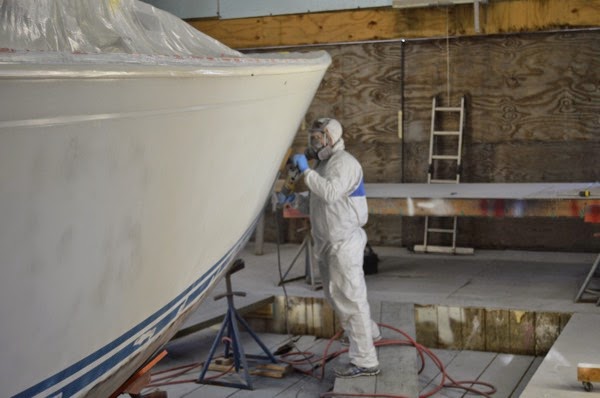
Charlie and I keep working on our respective tasks necessary for painting and the refit. Early in the week he worked on finishing sanding the second application of high-build primer and AwlFair fairing compound. The hull is, well, quite fair. On Friday I showed up to get some pictures and he had just completed washing the hull and shed in preparation for spraying the first coat of white base AwlGrip 545 Epoxy Primer.

Before leaving work to enjoy his weekend, he sprayed the hull. Things are progressing nicely on his end.

Washed, re-taped and ready for the AwlGrip 545 primer:

DSC 0137

DSC 0138

As Charlie was working I spent as much time as I could working on the cabin sole project. Because of extremely low temperatures keeping my shed at recommended temperatures for applying epoxy was a hit-or-miss affair. I was able to tape the edges of the cabin sole inserts and apply West System epoxy to the edges. My wife and I had to run up to Annapolis for a day to attend a memorial service for the mother of a dear friend of ours on Friday.

Saturday the temperatures actually rose above freezing so I fired up the propane heaters and got the temperatures in my shed above 60F. After some more grinding and routing on the underside of some of the pieces, I mixed up some West System and applied it to the undersides of the flooring. Unfortunately, I didn’t have enough to complete the work so only the main cabin floor boards were coated. I’ll get more on Monday. I have two gallons of System Three epoxy that hasn’t been opened yet but I’m saving that for another larger project.

Floorboards with epoxied edges:

DSC 0116

DSC 0118

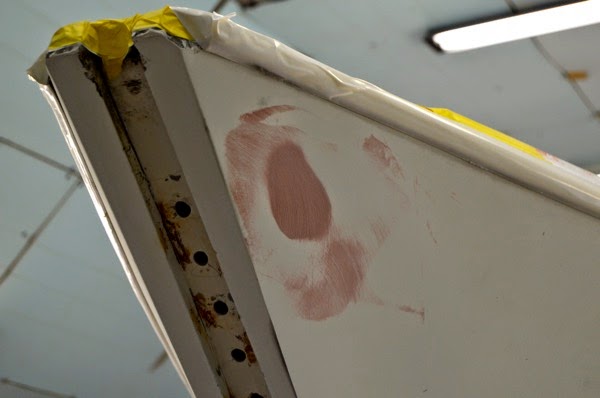
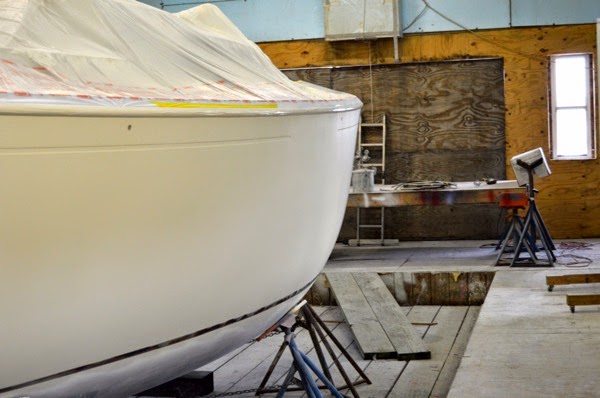
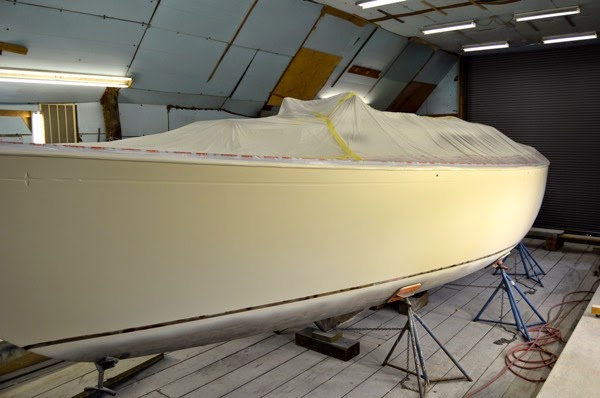
Ronin’s hull after the AwlGrip 545 Epoxy Primer application:

DSC 0139

DSC 0142

The famous C&C star...

DSC 0149

Applying West System to the underside of the floorboards:

DSC 0154 

DSC 0158 

‘Warmer” weather on tap for next week...

Sunday, March 1, 2015

Week Five - Amateur Woodworker

Work progresses on the hull. Despite still being extremely cold the sanding and priming of the hull continues. Still more snow has shut down operations in this area on several occasions. During the last week I have been away much of the time, back in Arlington visiting friends and seeing my family.

I checked in on Ronin last Friday and not much the way of “action photos” to show but Charlie and I did spend some time discussing the merits of painting methods and the appropriate spray guns. After listening to Charlie describe shooting techniques and the quality of guns he uses, I really felt out of my depth. I know that when I go to shoot my decks that the results will be “interesting."

A spray gun for every job (pro tip, the Sata, 2nd from right):

DSC 0176

Primed and ready for yet more sanding:

DSC 0112

DSC 0117

I’ve turned my focus back to working in my shed on the cabin sole yet again. Confession time: a few weeks back I set up everything to make a rip of the first 4X8 sheet that would become the two pieces in the main cabin. I measured, measured again, set up a guide and took my time to make sure that I had everything set up correctly. It all looked okie-doke.

One thing though. I wasn’t sure about what was the best blade to use in my trusty old Bosch jigsaw. Now, I have used that tool for many things over many years yet for some reason I overthought the problem. So, since we know that everything on the Internet is true, I did a search for the correct blade to use.

Put the recommended blade into the jigsaw, flipped the switch and started in on the cut. About half-way down cut, the blade torqued, veered off on an angle and that was that. One completely ruined expensive sheet of teak and holly plywood. After calming down, I inserted the blade that I had originally planned on using, set up the guide and made a “test” cut on the now useless piece of plywood. Perfect...

After ordering another sheet, I went the simple route after getting some advice from my friend Vincent who built our house and just used my Skillsaw. Another perfect cut.

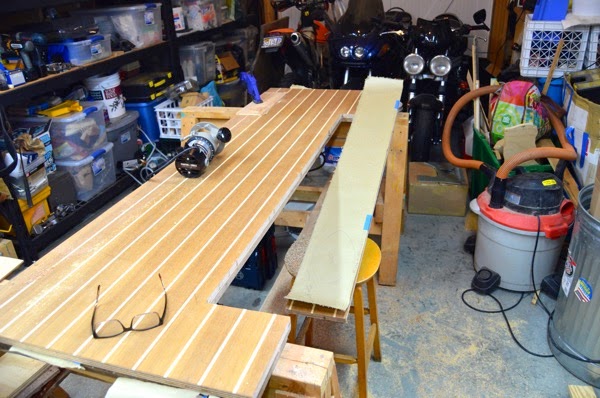
Sooo, after after getting over my understandable doubts about my abilities I pulled out the router to carve out the section that will be used for the hatch boards. After practicing many times with some cheap stock, I put in a 1/2” by 1” router bit and fired it up.

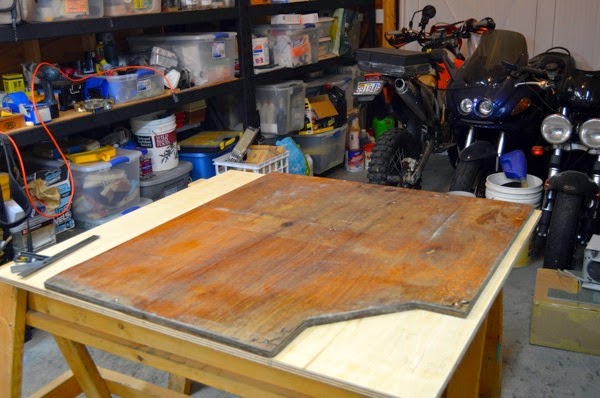
I got it about 97% correct this time. I wasn’t paying attention but the old cable sole being used as the template had delaminated in some spots and as I was running the router down the line, the guide dropped into some voids in the ply. Not pretty but I will do some work with West System and pieces of salvaged laminate and it should be okay. The 1/4” teak edging on each side will hide some of the problem I hope.

Prep and router cut:

DSC 0152

DSC 0154

The problem with rotten templates:

DSC 0157

Prepping the cut-out for three hatchboards:

DSC 0161

Later during the week I pulled the second sheet of plywood out and started laying out the templates for the two sections at the navigation station and galley. The one in front of the head is still on the boat so I was only able to cut out the one in the v-berth.

By and large these cuts went okay although there is a very slight gap between the two sections in the galley/nav area. That’s due to the problem of making a third cut-out based on a (rotten) template of the original cabin sole boards.

Laying out the old cabin sole templates and screwing them down:

DSC 0202

DSC 0205

Finished with routing the edges:

DSC 0209

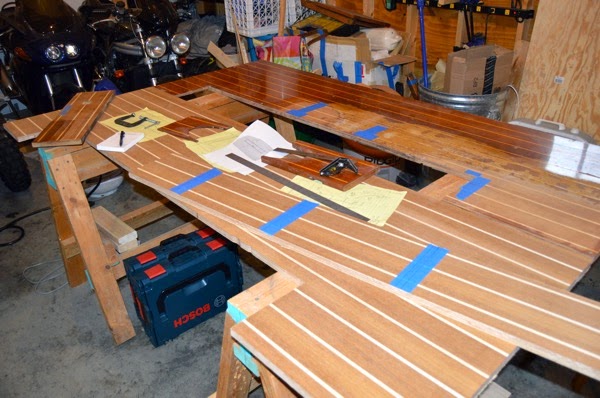
Panels arranged on the shed floor:

DSC 0210

When the weather warms up and I can get stable temperatures in my shed I’ll start sealing the plywood with epoxy and then applying the finish coats to the surface.

Saturday, February 21, 2015

Week Four - Cold Sanding

For this week not much to really show in terms of photos. Progress is being made, much of it with the board file and large sander.

There are several hard (high) spots, particularly on the port side. Charlie is steadily working them down and making the hull fair. Work continues.

This past week we in the Mid-Atlantic have been in the grip of record low temperatures along with snow. Despite a “snow day” when work stopped at the yard, we’re still roughly on schedule. If the temperatures increase sufficiently next week then another layer of primer will be applied. Afterwards, well, more sanding of course.

Hard spots (grey areas) along the port hull:

DSC 0009

Sanded all the way to the fiberglass:

DSC 0010

Close-up of board file results:

DSC 0008

More filling and fairing of cracks at the waterline:

DSC 0011

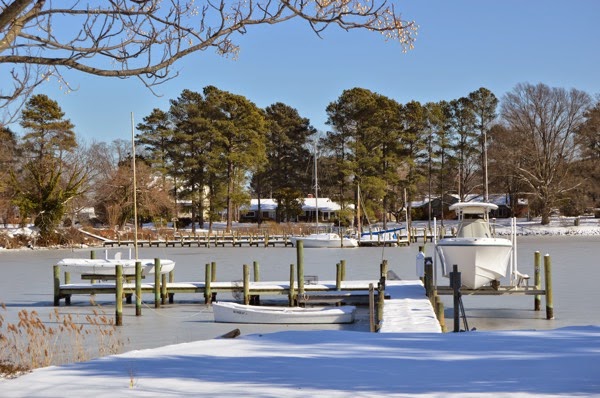
Shot of the dock with frozen creek:

DSC 0061

Let’s hope for a change in the weather...

Monday, February 16, 2015

Week three, still scratching...

I think that at this moment it would be important for me to put down some thoughts about this effort that are not necessarily focused on what techniques, tools and processes that are being used to repaint Ronin. I know that I spend an inordinate amount of time scanning the internet for sources of techniques and tools required to complete the tasks and projects of this refit.

After observing how Charlie is approaching this project, I think some observations are in order.

First, he is doing this project from front to back. From arranging the haul dates with me, the length of time expected to complete the hull, the scope of work, the pros and cons of tackling certain aspects of the project to blocking the hull, prepping and painting the boat. There are no other people involved. Just Charlie. 

I feel as though I have relinquished control my boat and, to some degree, the vision for how it will turn out to him. But here’s the thing, after seeing several of his other jobs and working with him, I can’t imagine any other way to see it through. Although I think that I have a basic level of understanding about how to accomplish this job and a level of understanding about a good job versus a perfect job, it is clear to me that that the final outcome is going to be a level of detail that's a good cut above.

I’ve seen other Awlgrip paint jobs that are good. The hull is sanded, gross imperfections or defects repaired, prior paint jobs sanded off and then the hull repainted. That is not what is going to happen. As I watch Charlie work on the boat I can see that he is repairing gelcoat and laminate problems which is all well and good. But when I watch him sand, prime, sand and prime again to a level of fairness that 95% of owners would not even be aware of and then exceed that level, I am am impressed. It isn’t a matter of discussion with us as to whether this is needed or not. For Charlie it will be perfect and nothing less is acceptable.

When I was planning on painting the boat myself, my expectations of the final results were much, much lower. I would have been fine with that. I don’t have the chops to do more. My results would have passed the 15 yard distance away level of beauty, no sweat.

It has become clear to me that when this job is done, the hull will be more fair than when it left the factory. The finish of the paint will be of Hinckley quality.

Now, does it make sense to do that to a 33-year old production sailboat? No. Will others even notice or care? Probably not. Will we get the expense back on resale? Not a chance.

But will I appreciate the level of effort? Yes. I’m certain that every time I row away from the boat and look back at her I will be reminded of the dedication to the highest level perfection.

Sanding, priming, sanding, priming...

DSC 0033

DSC 0042

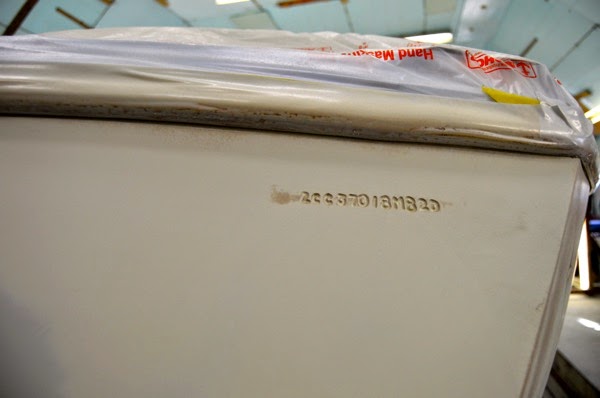
I was concerned that already faint HIN numbers would get lost in the final outcome. Charlie’s fix was to take a Dremel tool and open them up:
DSC 0043

While the boat work has been proceeding in the boat shed, I have (very…) casually been working on the new cabin sole flooring. 

First cut:

DSC 0003

When I replaced the floor years back I converted the design from three access hatches to just two that were a bit longer. That proved to be a minor irritation because I couldn’t really get to the back part of the bilge for cleaning and finding lost tools.

For this iteration, I will go back to three access hatches.

Laying out the hatch boards:

DSC 0018

Expanding the opening with a 10 inch cut:

DSC 0020

This last weekend we lost power for almost 24 hours due to high winds from a brutal front passing through. Since the house was cold and we couldn’t get our daily internet fix, we jumped in the truck and drove to our favorite oyster and beer spot, Merrior in Topping, VA. One of the sights that is always sobering to me when we arrive is below.

Sad old derelict at very low tide:

DSC 0047

As the story is told, apparently a gentleman brought her in to escape the ravages of Hurricane Isabel (2003) but she went down anyway. And the owner passed away a few days later...

Monday, February 9, 2015

Week 2 in the shed.

Since the boat went into the paint shed I’ve been reduced to pretty much just showing up and taking pictures of the progress on the hull painting. I feel inadequate. But that’s as it should be because the true professional is working away on Ronin. Having seen his work on my friend’s J/40 I sleep well at night.

I need to turn my attention back to work on the cabin sole project residing in my shed but haven’t yet had the opportunity to do that. The “work” of retired life intrudes. Odd.

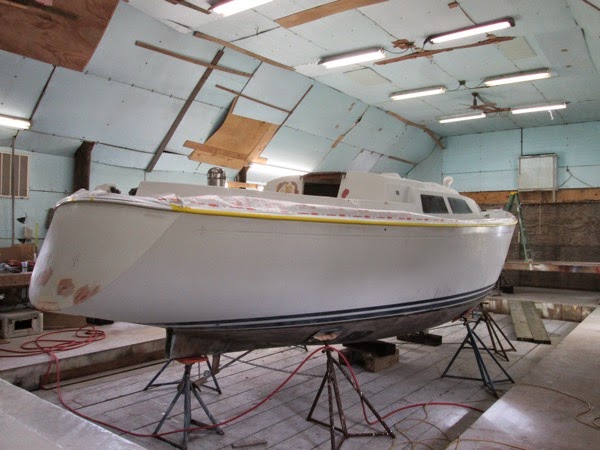
For this posting I thought I show a series of “before and after” shots. As of Friday, February 6th, the hull had been sanded, cracks and imperfections ground out and most importantly, four coats of AwlQuick primer sprayed on. A goodly amount of progress.

In the following set of photos there is an area on the stern quarter that is grey’d a bit. This is a process that Charlie uses to find imperfections in the hull and the sanding. I know how he does it but am under strict orders of confidentiality to not divulge them.

Stern quarter shots:

DSC 0006

DSC 0017

Section on the port bow that required grinding and filling:

DSC 0024

DSC 0007

Port side near the toe-rail:

DSC 0029

DSC 0003

After some intensive sanding and filling of the stern counter:

DSC 0031

DSC 0013

Next week, Charlie will be removing 75% of the primer that he applied. With a long-board. I’ve done that and I don’t envy him one bit….

Primed and ready for the board-file:

DSC 0022

Sunday, February 1, 2015

In the shed, Week 1.

The hull has been in the shed for a week now and Charlie has started in on prepping the hull for painting. When we realized that removing the vinyl rub-rail was pretty much a non-starter, he ran a buffer with mineral spirits along it and despite some cuts and gouges it cleaned up pretty nicely.

The next step was a complete wash of the hull using Mean Green. Afterwards Charlie started taping the boat. Before he completed that I needed to get below the cockpit to look at the layout of the bilge lines and the cockpit scupper drains. This has been an area of annoyance for me since we bought the boat. The main bilge line using the manual Whale pump next to the wheel in the cockpit exits on the port side underneath the stern. The smaller electric bilge pump line snakes up from the bilge, extends over to the starboard side and then “Tee'd” in the starboard scupper drain just above the thru-hull fittings.

When I replaced the replaced the thru-hulls and seacocks some years back, because of the extended height of the seacocks, the hose run from the scupper drains was not direct and had a small sump. Because of this water never completely drained and if there was any debris it often developed a clog. To make matters worse, C&C designed deck level drains with a narrow grove to channel the water to a small scupper drain that led to a 6’ length of hose that, again, did not drain directly downhill. While in theory this seemed a great idea, those drains never did. These lines “Tee’d” into the scupper drains too. A mess.

Up, down and around:

IMG 0881

Going forward I plan on doing three things: 1.) running the electric bilge pump line directly to a new thru-hull near the existing manual bilge pump thru-hull, 2.) capping the two small scupper drains in the deck and removing the lines and 3.) removing the grey polypropylene fittings and ensuring that the cockpit scupper drain hose run downhill and free.

The reason for not completely removing and glassing in the shallow groves is that if in the future the boat is used for cruising and I want to catch rainwater, they can be plumbed to the port and starboard fresh-water tanks using small valves to open the flow after all the contaminants have run off.

The drain and channel; nice idea in theory but...

IMG 0244  Version 2

Manual bilge line running aft:

IMG 0886

After I finished scoping all that out, Charlie continued taping the boat. Afterwards sanding started. He mentioned that the gelcoat was “hard” and that it was taking longer to sand and using sanding disks at a pretty high rate. Oh well. In addition to sanding he spent some time grinding out any cracks and irregularities that he came across.

Taping:

IMG 0892

IMG 0894

Sanding and grinding:

DSC 0031

DSC 0036

An area of resin deficient layup near the bow: 

DSC 0038